Digital Disposable Camera App: Best Settings for Events
Digital disposable camera apps work best when they feel like part of the event, not another task guests have to remember. The right settings create that feeling: guests scan, snap a few intentional photos, and move on while the host ends up with one organized gallery instead of a messy pile of group chats, AirDrops, and late uploads.
The best setup is not just about filters or nostalgia. It is about choosing smart limits, timing the gallery reveal, placing QR codes where guests will actually scan them, and protecting privacy before the first photo is taken.
Below is a practical settings guide for weddings, parties, corporate events, school events, retreats, and brand activations using a digital disposable camera app like Revel.cam.
What the best settings should accomplish
A physical disposable camera works because it has constraints. There are only so many shots, the camera is passed around, and the photos feel like a surprise later. A digital disposable camera app should preserve that feeling while removing the worst parts of film: lost cameras, blurry scans, development costs, and waiting weeks for photos.
For event hosts, the best settings should do four things:
- Make participation nearly instant, with QR, NFC, or link access
- Limit photos enough to keep guests intentional
- Stop uploads at the right time, so the gallery stays event-specific
- Give the host review control before anything is widely shared
With Revel.cam, the host creates a Moment, sets the guest limit, sets how many photos each guest can take, chooses when the Moment ends, and shares access through a QR code, NFC tag, or link. Guests join without a signup or app install, and on iPhone, Revel.cam can launch as an App Clip so the camera opens quickly from a scan.
If you are still comparing tools, start with this overview of how a disposable camera app works for events. If you already know you want the disposable-camera vibe, use the settings below as your blueprint.
Best digital disposable camera app settings by event type
Use this table as a starting point, then adjust based on guest count, event length, lighting, and how much moderation you want to do afterward.
| Event type | Guest cap setting | Photos per guest | Moment end time | Reveal and review setting |
|---|---|---|---|---|
| Wedding ceremony and reception | Expected guest count plus 10% to 15% buffer | 8 to 12 | 30 to 60 minutes after the reception or after-party | Host review first, guest reveal the next day |
| Rehearsal dinner or welcome party | Expected attendees plus small buffer | 5 to 8 | Shortly after dinner or final drinks | Host review first, then share with attendees |
| Birthday or house party | Expected guests plus 10% buffer | 6 to 10 | 30 minutes after the planned end | Reveal later that night or next morning |
| Corporate event or conference | Registered attendees or invited contributors only | 3 to 6 | At session close or event close | Host review required before sharing |
| Brand activation or launch | Cap based on desired contributor volume | 1 to 4 | End of activation window or per session | Review before any public or client-facing use |
| School or university event | Expected attendees plus staff buffer | 4 to 8 | After the event ends | Review before sharing with students or families |
| Group trip or retreat | Participants plus a small buffer | 5 to 10 per day or activity | End of each day or trip segment | Reveal at dinner, checkout, or trip wrap |
The key is to set limits based on the gallery you want, not just the number of people in the room. A 200-person event with 20 photos per guest could create a maximum of 4,000 photos, which is usually more curation than a host wants. A 200-person event with 5 photos per guest still gives you up to 1,000 possible photos, which is more than enough for most private galleries.
Setting 1: Choose the lowest-friction guest access
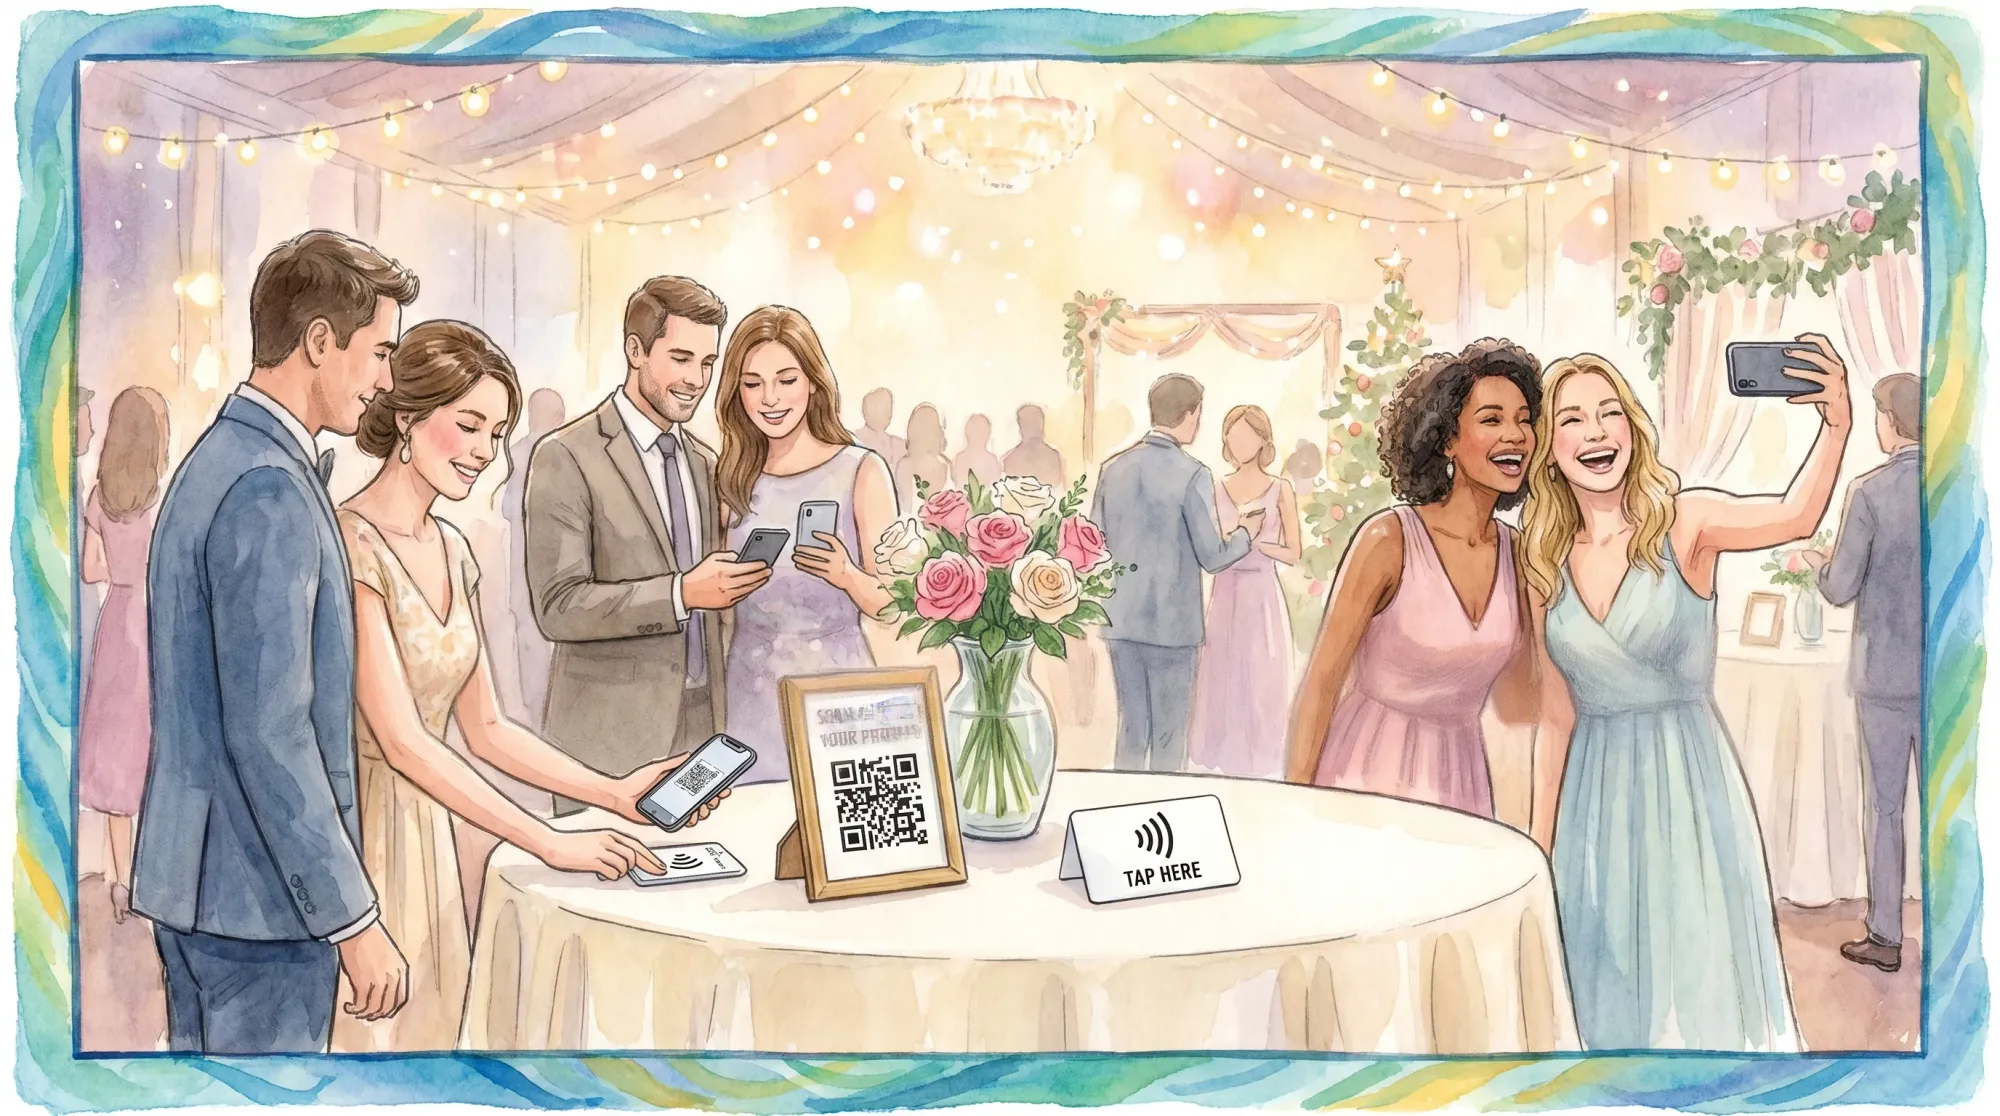
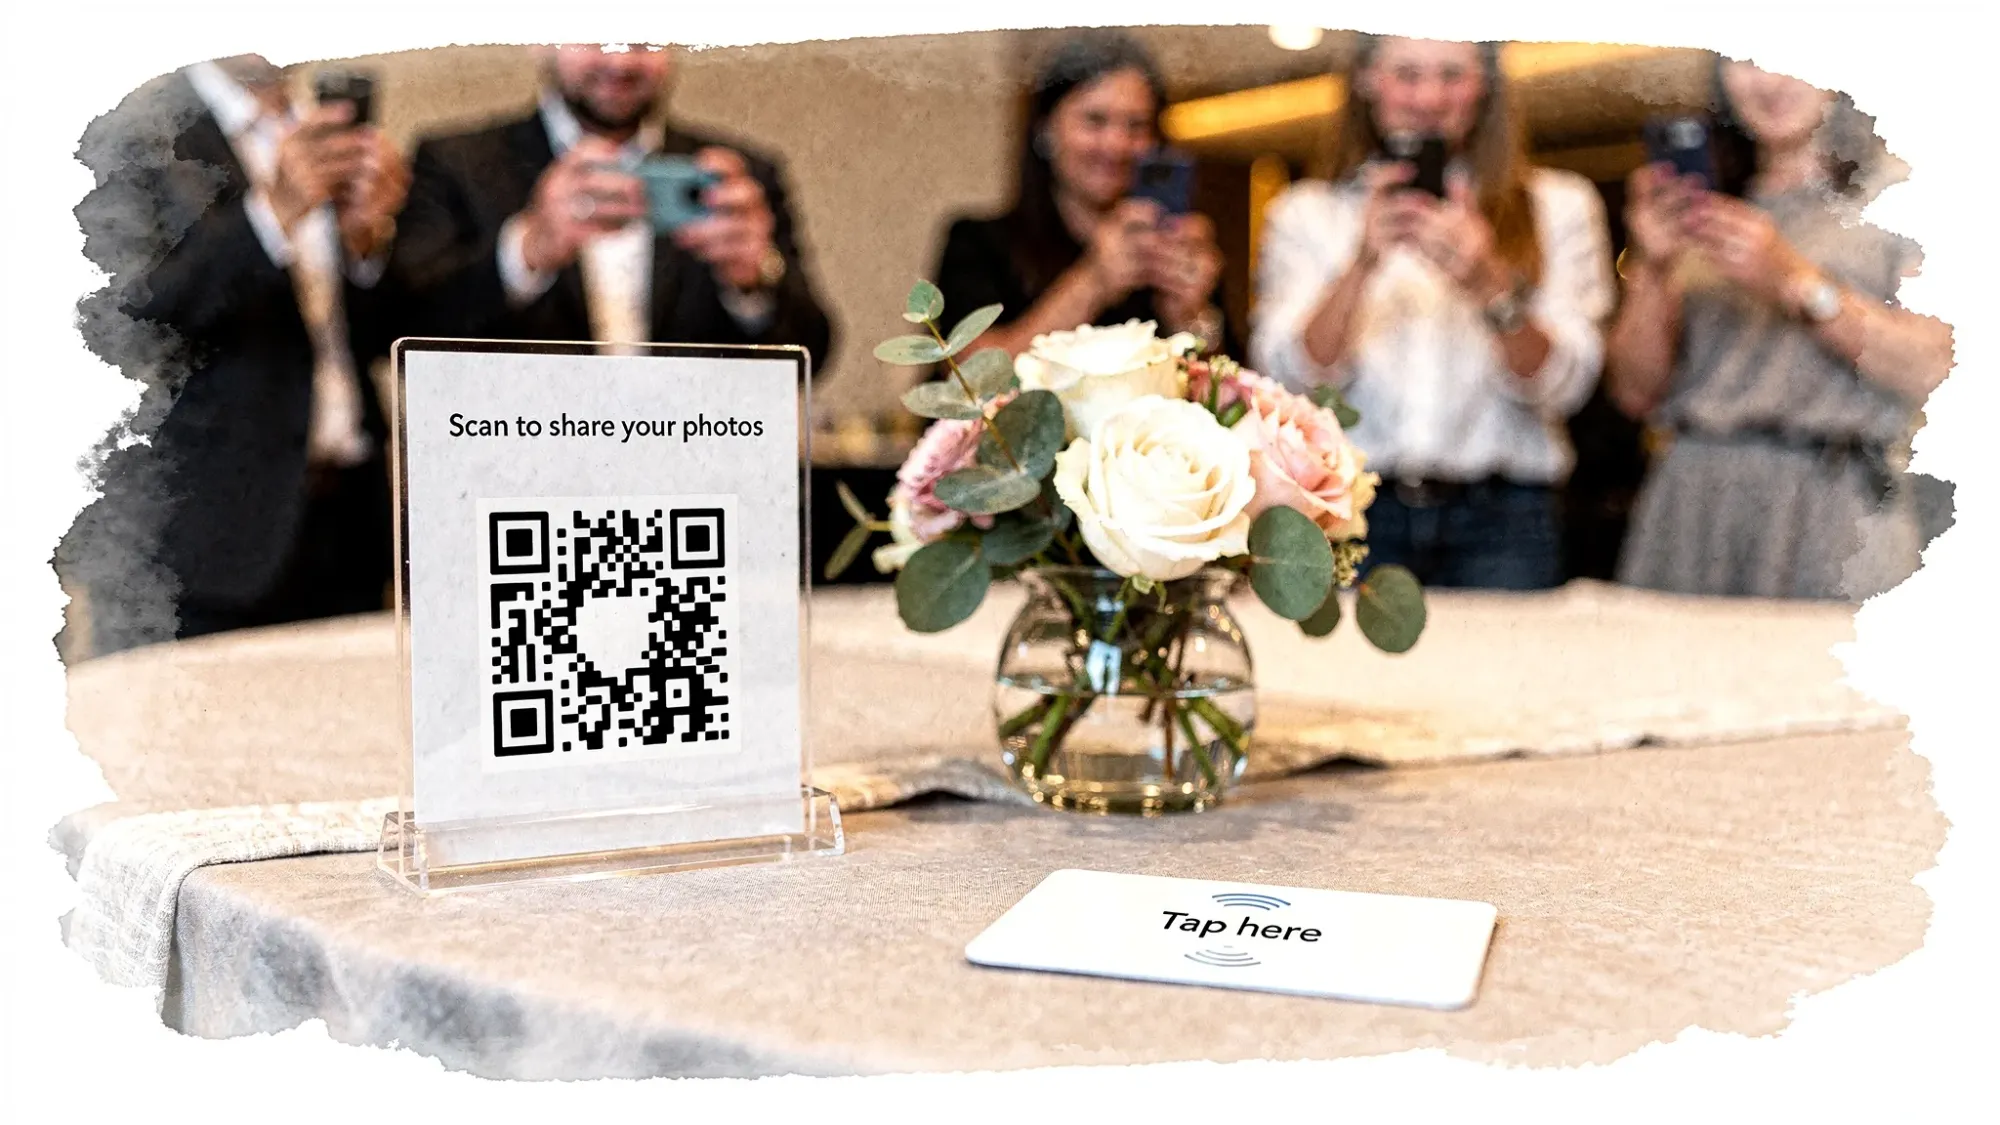
The best access setting is the one guests can use without thinking. For most events, that means using more than one entry point: a QR code for signage, an NFC tag for quick tap access, and a link for guests who are remote, late, or having trouble scanning.
A good digital disposable camera flow should not send guests to an app store, require a password, or ask them to create an account before they can take a photo. Every extra step reduces participation, especially during a wedding reception, dance floor moment, networking break, or crowded party.
For Revel.cam, the cleanest host setup is simple: create the Moment, display the QR code in high-traffic areas, add NFC where guests naturally pause, and keep the link available for texts, schedules, or event websites. The goal is to make the camera feel like part of the venue.
Good QR and NFC locations include welcome signs, bar signs, table cards, check-in desks, programs, name badges, wristbands, photo corners, and printed itineraries. For seated events, put at least one scan point where guests sit. For standing events, put scan points near traffic bottlenecks like the entrance, bar, lounge, and activity stations.
For large outdoor activations, the app settings only work if guests can actually find and use the scan points. If your activation is built around a branded booth, container bar, or container-style pop-up, confirm the physical footprint early, including lighting, shade, power, QR placement, and delivery logistics. Teams sourcing semi-permanent structures can compare vendors that let them buy shipping containers online before finalizing where camera stations and signage will live.
Setting 2: Set the guest cap slightly above expected participation
Guest cap controls are underrated. They help keep the Moment private, prevent unintended participation, and make the gallery size more predictable.
For private events, set the guest cap slightly above the number of people who may realistically join. A 100-person wedding does not need a 500-person cap. A good rule is expected guests plus 10% to 15% to allow for vendors, plus-ones, family helpers, or people using a second device.
For corporate events, be more intentional. If the Moment is for internal culture photos, set the cap around the employee and approved attendee count. If it is for a public-facing activation, set the cap based on staffing and review capacity rather than foot traffic. A gallery that is too large can become difficult to moderate.
For multi-day events, consider separate Moments by day or activity instead of one giant open collection. This keeps photos easier to review, makes reveal timing more fun, and prevents a Friday night welcome party from getting mixed with Sunday brunch.
Setting 3: Use photo limits to recreate the disposable-camera feeling
The photo limit is the setting that most directly shapes photo quality. Unlimited uploads create noise. Too few photos can make guests hesitate. The sweet spot depends on the event type and how much you want guests to participate.
| Desired gallery style | Recommended photo limit | Best for | Why it works |
|---|---|---|---|
| Minimal and curated | 3 to 5 per guest | Corporate events, launches, formal dinners | Keeps the gallery polished and easier to review |
| Classic disposable vibe | 6 to 10 per guest | Weddings, birthdays, parties | Gives guests enough room for candids without flooding the gallery |
| Full weekend story | 10 to 15 per guest | Retreats, trips, wedding weekends | Captures more context across multiple activities |
| High-traffic activation | 1 to 4 per guest | Festivals, booths, school fairs | Keeps participation fast and prevents repetitive photos |
For weddings, 8 to 12 photos per guest usually works well. It is enough for getting-ready candids, cocktail hour, table shots, dance floor moments, and after-party energy without turning guests into unpaid photographers.
For corporate events, 3 to 6 photos per guest is usually cleaner. You want useful photos of networking, team moments, sponsor areas, speakers, and details, not hundreds of near-identical stage shots.
For birthdays and house parties, 6 to 10 photos per guest keeps the mood casual. Guests can capture arrivals, decorations, food, group photos, cake, dancing, and the end-of-night hug without overthinking it.
Setting 4: End the Moment after the last meaningful photo window
The end time is your guardrail against off-topic uploads. It tells guests, implicitly, that this gallery belongs to the event itself.
For a wedding, the Moment should usually end after the reception or after-party, not immediately after dinner. Some of the best guest photos happen once people relax: dance floor reactions, late-night snacks, friends reuniting, grandparents laughing at the table, and the final exit.
For a conference, end the Moment after the closing session, awards, or networking reception. For a brand activation, end it when the activation closes or when staff can no longer moderate incoming photos. For a house party, add a 30-minute buffer after the stated end because real parties rarely end exactly on schedule.
Avoid leaving the Moment open for days unless the event is actually multi-day. Long open windows invite accidental uploads, screenshots, memes, or photos that do not belong in the final story.
Setting 5: Use the gallery reveal as part of the experience
A digital disposable camera app becomes more memorable when the gallery reveal is intentional. If guests can view everything instantly, some will stop being present and start browsing. If the gallery is revealed after the Moment ends, the photos feel like a shared surprise.
For weddings, the best reveal is often the next morning or after the couple has had a chance to review the gallery. For birthday parties, a next-day reveal is fun because guests are still talking about the night. For corporate events, reveal timing should depend on approval needs. Internal galleries may be shared quickly, while client-facing or public galleries should be reviewed first.
A simple reveal plan looks like this:
- During the event: guests scan, take photos, and upload automatically
- After the Moment ends: the host reviews and removes anything unwanted
- Once curated: the host shares the final gallery with guests, attendees, or stakeholders
This keeps the experience fun without sacrificing control.
Setting 6: Turn on host review for anything public, professional, or sensitive
Moderation is not just about removing bad photos. It protects privacy, brand safety, and the emotional tone of the event.
For private parties and weddings, review helps remove accidental shots, blurry photos, duplicates, or images someone would not want shared. For corporate events, review is essential. It helps keep confidential materials, attendee badges, sponsor conflicts, and off-brand moments out of the final gallery.
For schools, universities, and youth events, be especially cautious. Make sure the event organizer has a clear policy for who can contribute, who can view the gallery, and whether photos can be shared outside the event community.
Good moderation settings should support the host’s real responsibility: creating a gallery that reflects the event accurately and respectfully. Revel.cam Moments are private by default, and hosts can review photos before sharing, which is exactly the kind of control most event workflows need.
Setting 7: Match signage copy to the photo behavior you want
Settings alone do not make guests participate. Your signage and verbal prompts tell people what kind of photos to take and how much effort is expected.
The best copy is short, specific, and permission-based. It should explain the action, the benefit, and the constraint in one glance.
Try these sign lines:
- Scan to snap a few candid photos for our shared gallery.
- You have 10 shots. Make them count.
- Help us capture the party from every table.
- Take one photo of your crew before dinner ends.
- Scan, snap, and you are done. No app or signup needed.
- Photos will be reviewed before the gallery is shared.
For weddings, lean emotional: Help us see the moments we missed. For corporate events, lean practical: Share team moments for our private event gallery. For brand activations, lean playful: Scan for your limited shots at the pop-up.
If you want more implementation detail, this guide to QR photo sharing for weddings and parties covers placement, scanning behavior, and event-day prompts in more depth.
Capture settings that improve guest photo quality
Host settings shape the workflow, but guests still need a little guidance to take better photos. You do not need a long instruction sheet. One or two visible tips are enough.
| Guest photo tip | When it matters most | Why it helps |
|---|---|---|
| Wipe the lens first | All events | Phone lenses collect fingerprints, which cause haze and softness |
| Use the 1x lens | Group photos and low light | Digital zoom often reduces quality |
| Step closer instead of zooming | Parties, receptions, networking | Closer subjects look sharper and more intentional |
| Face people toward light | Dinners, cocktail hours, indoor events | Better light improves skin tones and reduces blur |
| Use flash for close dance floor photos | Dark receptions and parties | Flash freezes motion and creates the nostalgic snapshot look |
| Hold still for one second after tapping | Low light | Reduces motion blur |
For the disposable-camera look, encourage close-range flash, candid framing, and imperfect-but-fun moments. Avoid heavy filters during capture unless your event has a very specific visual style. Clean originals are easier to curate, edit, print, and share later.
Three ready-to-use setup examples
Wedding reception setup
For a 120-guest wedding, set the guest cap around 135 to 140 and give each guest 8 to 12 photos. Start the Moment before cocktail hour and end it 30 to 60 minutes after the reception or planned after-party. Place QR codes at the bar, guest book, two or three dinner tables, and near the dance floor.
Use host review before sharing. The couple or planner can reveal the gallery the next morning or after a quick curation pass. This setup captures the guest perspective without competing with the professional photographer.
Corporate event setup
For a 300-person conference, decide whether the Moment is for all attendees or only internal contributors. If everyone can join, use a lower photo limit, usually 3 to 5 per guest, and make the privacy language clear on signage. End the Moment after the closing reception.
Use review before any gallery is shared. For brand-safe output, include prompts like team moments, booth interactions, speaker reactions, registration energy, and networking candids. Avoid asking guests to photograph confidential slides or restricted areas.
Birthday or house party setup
For a 40-person birthday, set the guest cap around 45 to 50 and give each guest 6 to 10 photos. Start the Moment when guests arrive and end it 30 minutes after the party is expected to wrap. Put the QR code on the entry table, bar, dessert table, bathroom mirror, and any photo corner.
A same-night or next-morning reveal works well. If the party is casual, keep moderation light but still review before sharing the gallery broadly.
Common settings mistakes to avoid
The most common mistake is choosing unlimited photos because it feels generous. In practice, unlimited photo collection creates duplicates, screenshots, accidental uploads, and more curation work. Limits make the experience feel more special.
Another mistake is relying on one QR code at the entrance. Guests may miss it, arrive distracted, or forget by the time the good moments happen. Put access points where photo-worthy behavior naturally happens: tables, bars, lounges, dance floors, check-in areas, and activity stations.
Do not reveal the gallery too early if you want guests to stay present. Instant browsing can shift attention away from the event. A post-event reveal usually feels more satisfying and gives the host time to review.
Finally, do not skip privacy language. Even a friendly one-line note helps set expectations. Tell guests whether photos are private, whether the host will review them, and who may see the final gallery.
A simple pre-event settings checklist
Before your event starts, confirm the essentials. This should take less than 15 minutes once your Moment is created.
- Guest cap matches expected participation plus a small buffer
- Photo limit fits the event type and desired gallery size
- Moment end time includes the final meaningful photo window
- QR code scans correctly from printed signs
- NFC tags work if you are using them
- Backup link is saved somewhere easy to access
- Signage explains no app or signup is needed
- Privacy or review language is visible
- One person knows how to check the Moment and review photos afterward
If you are using Revel.cam, that workflow is straightforward: create the Moment, choose the guest and photo limits, set the end time, share the QR code, NFC tag, or link, then review and reveal the gallery when the Moment ends.
Frequently Asked Questions
What is the best photo limit for a digital disposable camera app? For most weddings and parties, 6 to 12 photos per guest is the sweet spot. For corporate events and brand activations, 1 to 6 photos per guest usually keeps the gallery cleaner and easier to moderate.
Should guests be able to see the gallery during the event? Usually, a delayed reveal works better. It keeps guests present, recreates the surprise of disposable cameras, and gives the host time to review photos before sharing.
How many QR codes should I print for an event? For small parties, 3 to 5 well-placed QR codes may be enough. For weddings, use table cards plus signs at the bar, guest book, and dance floor. For corporate events, place codes at registration, networking areas, lounges, and sponsor zones.
Does a digital disposable camera app replace a professional photographer? No. It complements professional coverage by collecting candid guest perspectives. Use a pro for key moments, portraits, lighting, and guaranteed coverage, then use guest photos for the moments happening everywhere else.
Do guests need Wi-Fi to upload photos? A reliable cellular or Wi-Fi connection helps uploads complete smoothly. If the venue has weak service, place QR codes in areas with better reception, share venue Wi-Fi details if appropriate, and test scanning before guests arrive.
What is the best reveal time for a wedding gallery? The next morning is often ideal. It gives the host or couple time to review the gallery and lets guests relive the celebration while the memories are still fresh.
Turn your event into a shared camera
The best digital disposable camera app settings are simple: fast access, thoughtful photo limits, a clear end time, host review, and a reveal that feels intentional.
With Revel.cam, you can create a private Moment, invite guests by QR code, NFC tag, or link, let them snap photos without an app install or signup, and review the gallery before sharing it. It keeps the fun of disposable cameras while giving hosts the control and speed modern events need.
Create your Moment before the event, set the limits, print the QR code, and let guests capture the moments you would have missed.

A writer interested in connection, memory, and the everyday moments that matter more than we realize.
Tags: Digital disposable camera , Disposable camera app , Camera app , Vintage camera apps , Event photography , Event photo collection , Event photo sharing , Shared event photos