Wedding Inspo Photos: How to Save, Tag, and Share with Vendors
If you have 300+ saved wedding inspo photos, you’re not behind, you’re normal. The problem is that most inspiration stays trapped in “pretty pictures,” instead of becoming a clear, vendor-friendly plan.
Vendors do their best work when you can show them:
- What you like
- Why you like it
- What matters most
- What’s realistic for your venue, season, and budget
Below is a simple system to save, tag, and share wedding inspo photos so your photographer, florist, planner, and rental team can execute the same vision without 40-message threads.
Step 1: Save wedding inspo photos in one place (with the source attached)
Before you tag anything, reduce your “where did I save that?” chaos.
The goal: one source of truth
Pick a single home base for inspiration, then link out to everything else.
Common choices:
- Pinterest (best for discovery and quick sorting)
- Google Drive / Photos (best for files, screenshots, PDFs, and sharing)
- Notion (best if you want inspo + notes + decisions in one page)
- Canva (best for mood boards you’ll present to vendors)
You can absolutely use more than one tool, but make one the “master” and treat everything else like inputs.
Save with context (so vendors can act on it)
A photo without context is just a vibe. When you save an image, capture these two things:
- The link to the original (photographer, venue, planner, florist, publication)
- A one-line note about what you want to replicate (color, shape, lighting, layout, mood)
This is also the polite way to handle creative ownership. Inspiration is normal, direct copying is not. If you want a quick reference on usage, the U.S. Copyright Office fair use overview is a good starting point.
Screenshot rules (so you don’t lose quality)
Screenshots are fine, but they get messy fast. If you screenshot, immediately add a note in the filename or caption:
- Where it came from
- What element you’re saving (not “everything about this wedding”)
That one step prevents the most common vendor meeting moment: “Cute, but what am I looking at?”
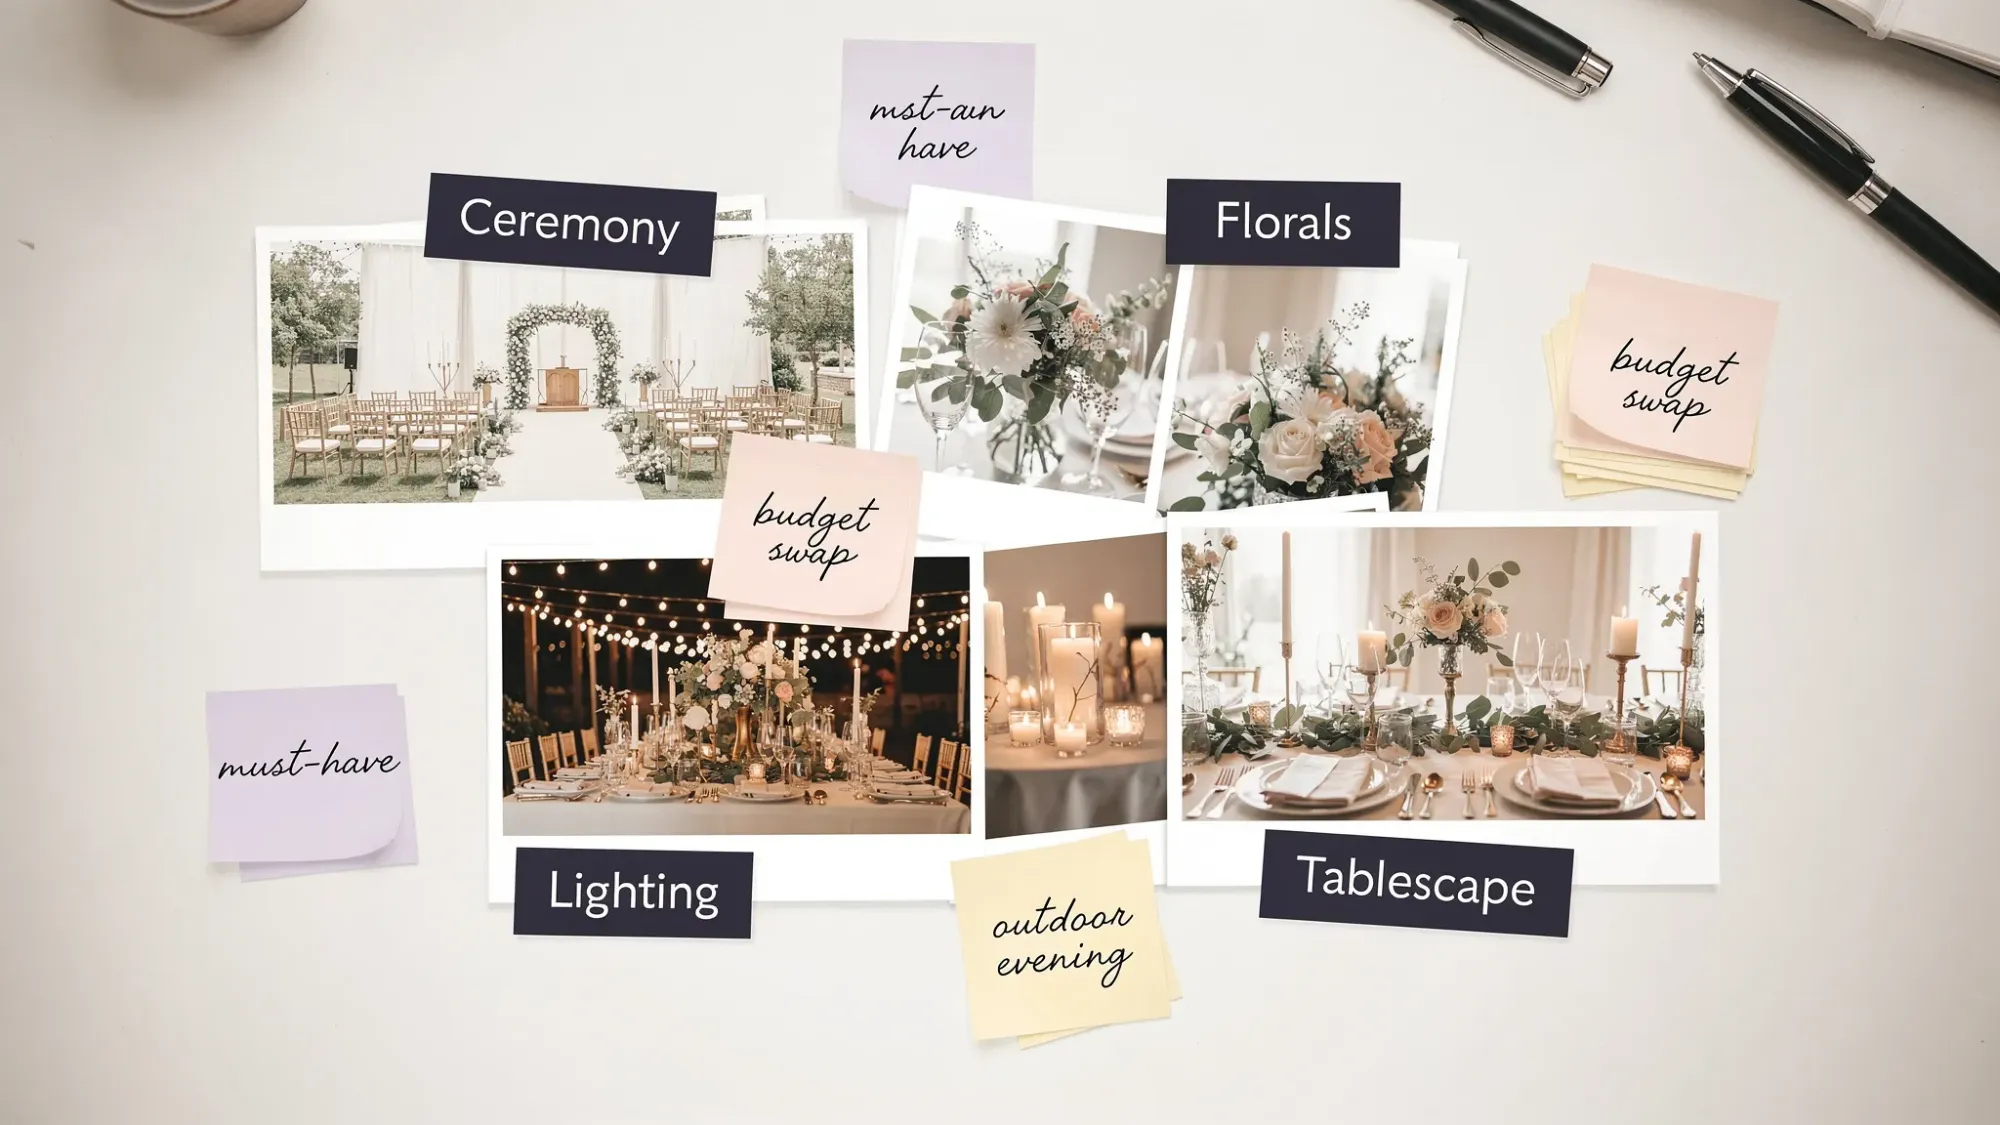
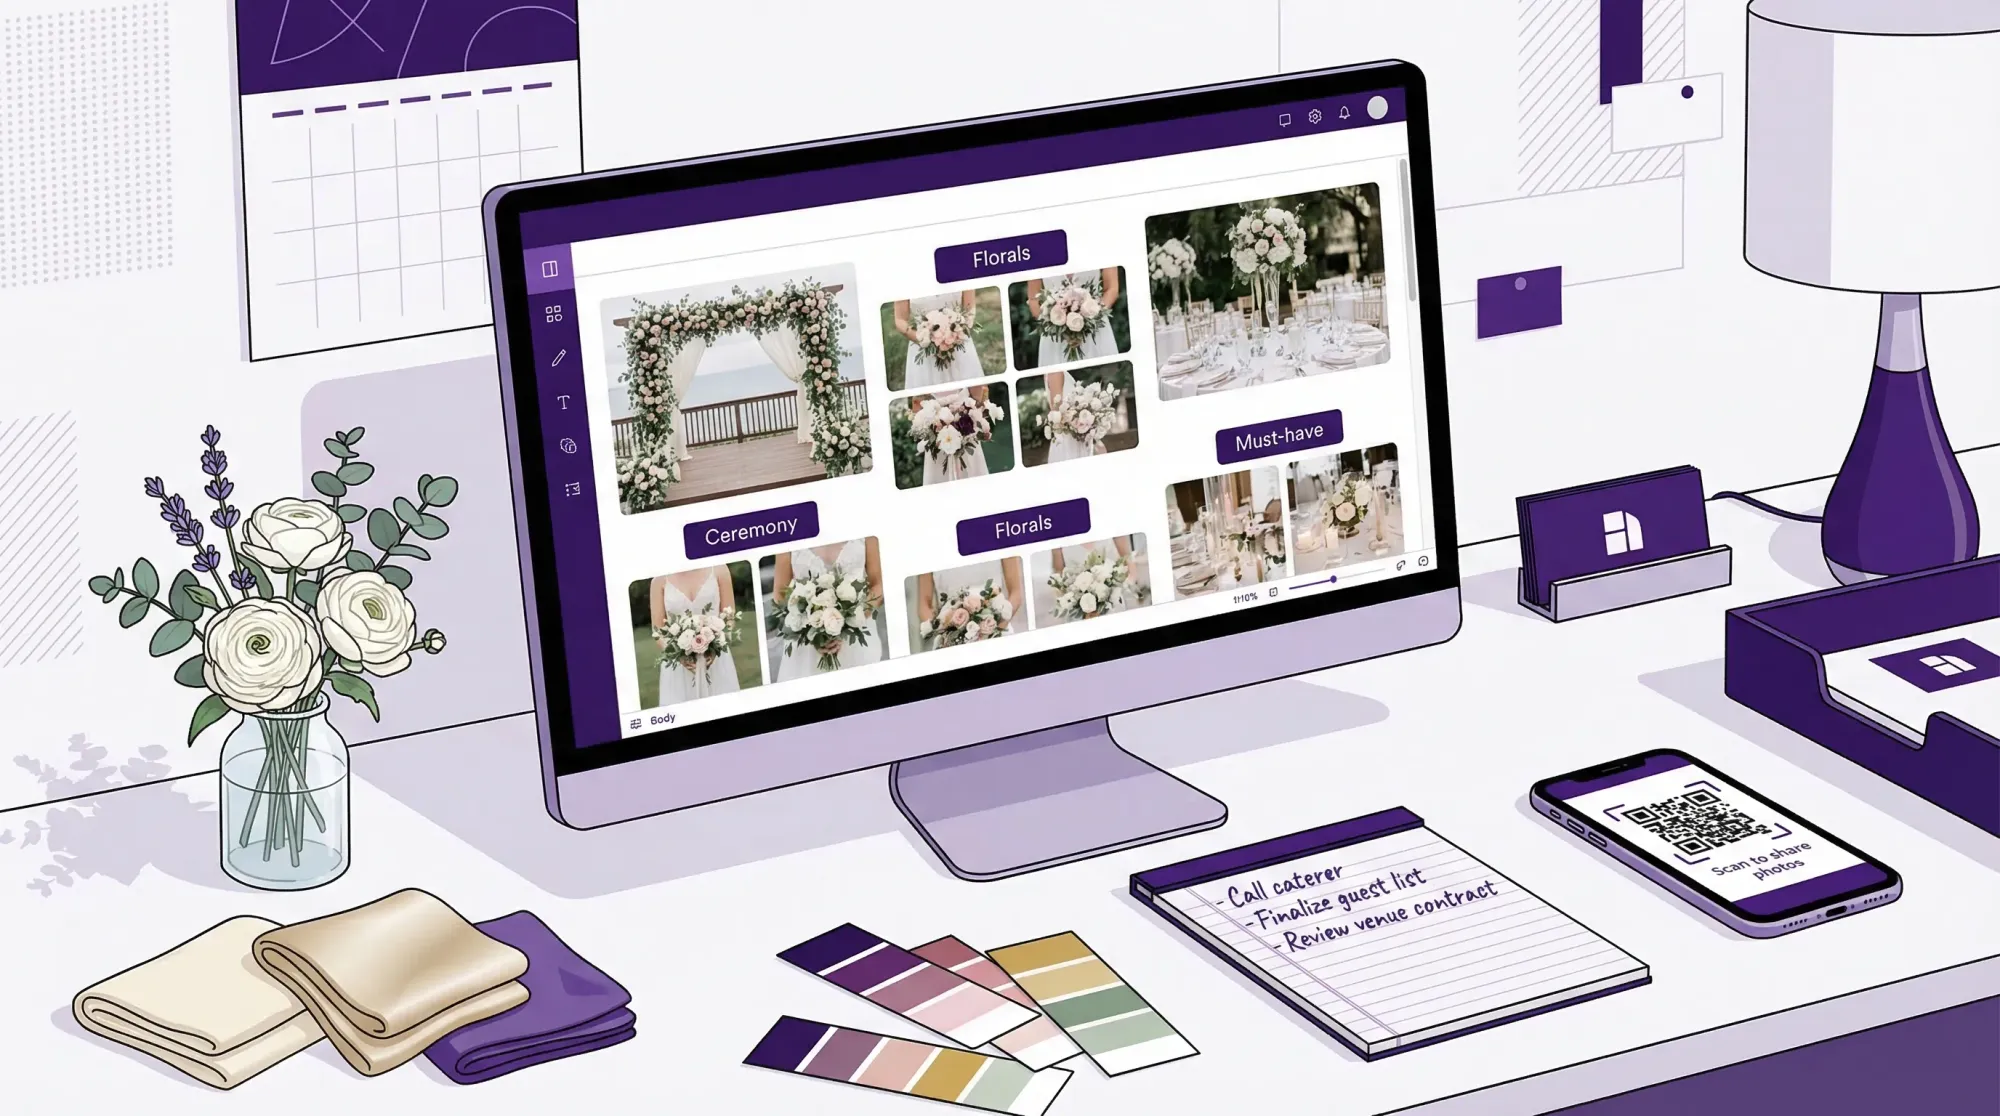
Step 2: Tag wedding inspo photos with a vendor-ready system
Tagging is what turns a scroll into a brief.
You don’t need a complicated taxonomy. You need tags that answer vendor questions quickly.
Use the “5-tag” method
For each inspo photo (or each small cluster of similar photos), add:
- Area: where this shows up (ceremony, cocktail, reception, stationery, portraits)
- Element: what you’re actually pointing to (bouquet shape, aisle markers, drape, flash photos)
- Preference: what you like (airy, editorial, colorful, minimal, garden)
- Priority: must-have, nice-to-have, not-for-us
- Constraint: a reality note (outdoor wind, no open flame, budget cap, venue rules)
Here’s what that looks like in practice:
| Inspo photo type | Example tags | What it tells a vendor in 10 seconds |
|---|---|---|
| Tablescape shot | Reception, Linen, Minimal, Nice-to-have, “Venue has dark wood tables” | You’re not asking them to copy the whole table, you’re pointing at linen + overall simplicity |
| Bouquet close-up | Florals, Bouquet shape, Meadow, Must-have, “Avoid lilies” | Shape and texture matter more than exact stems |
| Ceremony aisle | Ceremony, Aisle markers, Asymmetrical, Must-have, “No stakes allowed outdoors” | Design intent plus a known logistical limitation |
| Dance floor flash | Photos, Flash candids, Fun, Must-have, “Low light venue” | A shooting style choice, not a decor choice |
A simple naming convention that actually scales
If you’re saving files (Drive, Photos, Dropbox), rename what you keep.
A format that works:
Area_Element_Vibe_Priority
Example: Reception_Candles_Warm_Must-have
This sounds basic, but it makes searching (and sharing) dramatically faster.
Step 3: Curate before you share (vendors don’t need your whole board)
The biggest mistake couples make is sending vendors a link to 250 images and saying “we love all of this.”
Vendors cannot price, plan, or design from that.
The “10-10-5” curation rule
For each vendor you share with, aim for:
- 10 images that represent the overall direction
- 10 images that show key details relevant to that vendor
- 5 images of “not this” (to prevent mismatched expectations)
That’s enough to communicate the vision without overwhelming the consult.
Add captions that explain the “why”
A vendor-friendly caption format:
- What you like: “The airy, unstructured shape”
- What you don’t need: “Not married to these exact flowers”
- The constraint: “Late August heat, needs to hold up outdoors”
Captions reduce revision cycles. They also reduce the chance you get quoted for something you never meant.
Step 4: Share wedding inspo photos by vendor type (what to send to whom)
Not every vendor needs the same inspiration. If you tailor what you share, you’ll get better proposals and fewer “alignment calls.”
| Vendor | Share these wedding inspo photos | Include these tags/notes |
|---|---|---|
| Photographer | Portrait style, candid moments, lighting references, family photo vibes | Time of day, indoor/outdoor, flash vs natural, must-have moments |
| Florist | Bouquet styles, ceremony installs, centerpiece scale, color palette | Priority areas (ceremony vs reception), allergies, reuse plans, budget realism |
| Planner/coordinator | Full-room shots, layout flow, signage moments, guest experience cues | What matters most to you, what can flex, decision deadlines |
| Rentals/linens | Table shapes, linen textures, chair styles, lounge vignettes | Guest count, venue restrictions, delivery windows |
| Hair + makeup | Looks on similar skin tones/hair textures, “day to night” examples | Longevity needs, humidity, veil/headpiece plans |
| Stationery/signage | Invitation suites, menus, seating charts, typography | Names spelled correctly, print quantities, venue lighting (readability) |
Two practical sharing tips that vendors love:
- Start with one page: your top style words, palette notes, and 3 non-negotiables.
- Then add a link to the curated images.
If you want help turning Pinterest saves into decisions, this companion guide goes deeper on the planning side: Wedding Inspo: How to Turn Pinterest Saves Into a Real Plan.
Step 5: Choose a sharing format that won’t break (or annoy people)
A good vendor-sharing setup is:
- Viewable on mobile
- Easy to comment on
- Stable (links won’t disappear)
- Versionable (you can update without resending 12 attachments)
Best options (in most weddings)
Option A: Google Drive folder (view-only) + a 1-page PDF
- Folder structure:
Inspo (Curated)andInspo (Extra) - Put the PDF at the top named
READ ME FIRST
Option B: Canva mood board link
- Great when you want a clean presentation
- Keep it short (one to three pages per vendor)
Option C: Notion page
- Best when you want inspo + notes + decisions together
- Make sure guests and vendors don’t need a login to view (test in an incognito window)
The “permission” checklist
Before you send anything, confirm:
- Anyone with the link can view (if that’s intended)
- Comment access is enabled only if you want feedback in the doc
- You’re not sharing a personal photo library that includes unrelated private images
Step 6: Align with vendors without asking them to “copy this exactly”
You’ll get better work (and better relationships) if you treat wedding inspo photos as communication, not a recipe.
Try language like:
- “We love the feeling of this, especially the warm light and movement.”
- “We’re drawn to this composition, not the exact posing.”
- “Can you help us get this level of fullness within our budget?”
If you’re talking to a photographer, most will also appreciate clarity on what’s realistic. For example, editorial flash reception photos often require comfort with flash and a timeline that leaves room for it.
(If you’re currently comparing coverage, this guide helps you evaluate deliverables and expectations: Wedding Photographers Near Me: How to Compare Packages.)
Step 7: Create your own wedding inspo photos (the shortcut most couples miss)
Some of the best “inspo” isn’t from Pinterest, it’s from your actual venue, your actual lighting, and your actual people.
High-value moments to capture during planning:
- Venue walkthrough (especially ceremony spot at the same time of day as your ceremony)
- Rental mockups or linen pulls
- Hair and makeup trial (indoor and outdoor lighting)
- Floral samples
- Rehearsal dinner layout and lighting
The problem: those photos end up scattered across friends’ phones
Someone takes a great shot of your hair trial from the side, your mom captures the floral sample, your planner snaps the ceremony corner, and then you spend two weeks texting “can you send me that?”
A clean fix: use a shared camera Moment to collect planning photos
With Revel.cam, you can create a private Moment for a venue walkthrough or design meeting, then share it via a QR code, link, or NFC tag so everyone can contribute instantly. Guests do not need to create an account, and iPhone users can join via an App Clip.
A practical way to use it during planning:
- Create a Moment called “Venue Walkthrough” or “Design Mockup Day”
- Set a reasonable photo limit so the gallery stays usable
- End the Moment after the session so it doesn’t collect random future photos
- Review the gallery, then share only the best references with vendors
If you want the full mechanics of QR capture, this guide breaks down setup details and real-world placement tips: How to Take a Photo With QR Code Sharing for Your Event.

Step 8: Send the right thing at the right time (timing matters)
Even perfectly tagged wedding inspo photos can fail if they arrive too late.
A simple timing guideline:
- Before initial consult: share your 1-page summary + curated set (so they walk in aligned)
- After booking: share the updated “top 10” once you’ve made key decisions (palette, venue, vibe)
- 30 to 60 days out: share only what changed, plus any new constraints (timeline, weather plan, restrictions)
This reduces scope creep and keeps proposals accurate.
A quick recap (what “good” looks like)
You’re done when you can answer:
- “If I had to describe our wedding in three words, what are they?”
- “What are our must-have visuals (max 3 to 5)?”
- “Can each vendor open one link and understand what they need to build?”
When that’s true, your wedding inspo photos stop being a pastime and start being a planning advantage.
If you want an easy way to collect real-life reference photos during planning (and guest photos on the wedding day) without apps, logins, or group chats, you can set up a Moment in minutes at Revel.cam.

A writer interested in connection, memory, and the everyday moments that matter more than we realize.
Tags: Wedding inspiration , Wedding photos , Wedding photography , Wedding photo gallery , Wedding photo sharing , DYI wedding photography , Group wedding photos