Camera App Filter vs Editing: Which Looks More Natural?

If you are trying to get photos that look “natural,” the biggest trap is assuming you have two clean choices: a camera app filter or editing later. In reality, your phone is already making dozens of decisions (tone mapping, sharpening, noise reduction, HDR blending) before you ever touch a filter.
So the more useful question is this: where do you want creative decisions to happen, at capture time or after you can see the full set?
This guide breaks down what a camera app filter really does, what editing can do more naturally, and how to choose a workflow that looks real (especially when you are collecting photos from lots of guests at an event).
What “natural” actually means in 2026 phone photos
Most people use “natural” to mean:
- Skin looks like skin (texture stays, no plastic smoothing)
- Colors match the scene (white dress stays white, not beige or blue)
- Highlights are not blown out (foreheads, windows, candles)
- Shadows still have detail (dark suits, reception corners)
- Sharpness feels believable (not crunchy edges)
Natural does not mean “un-edited.” It means the edits are invisible.
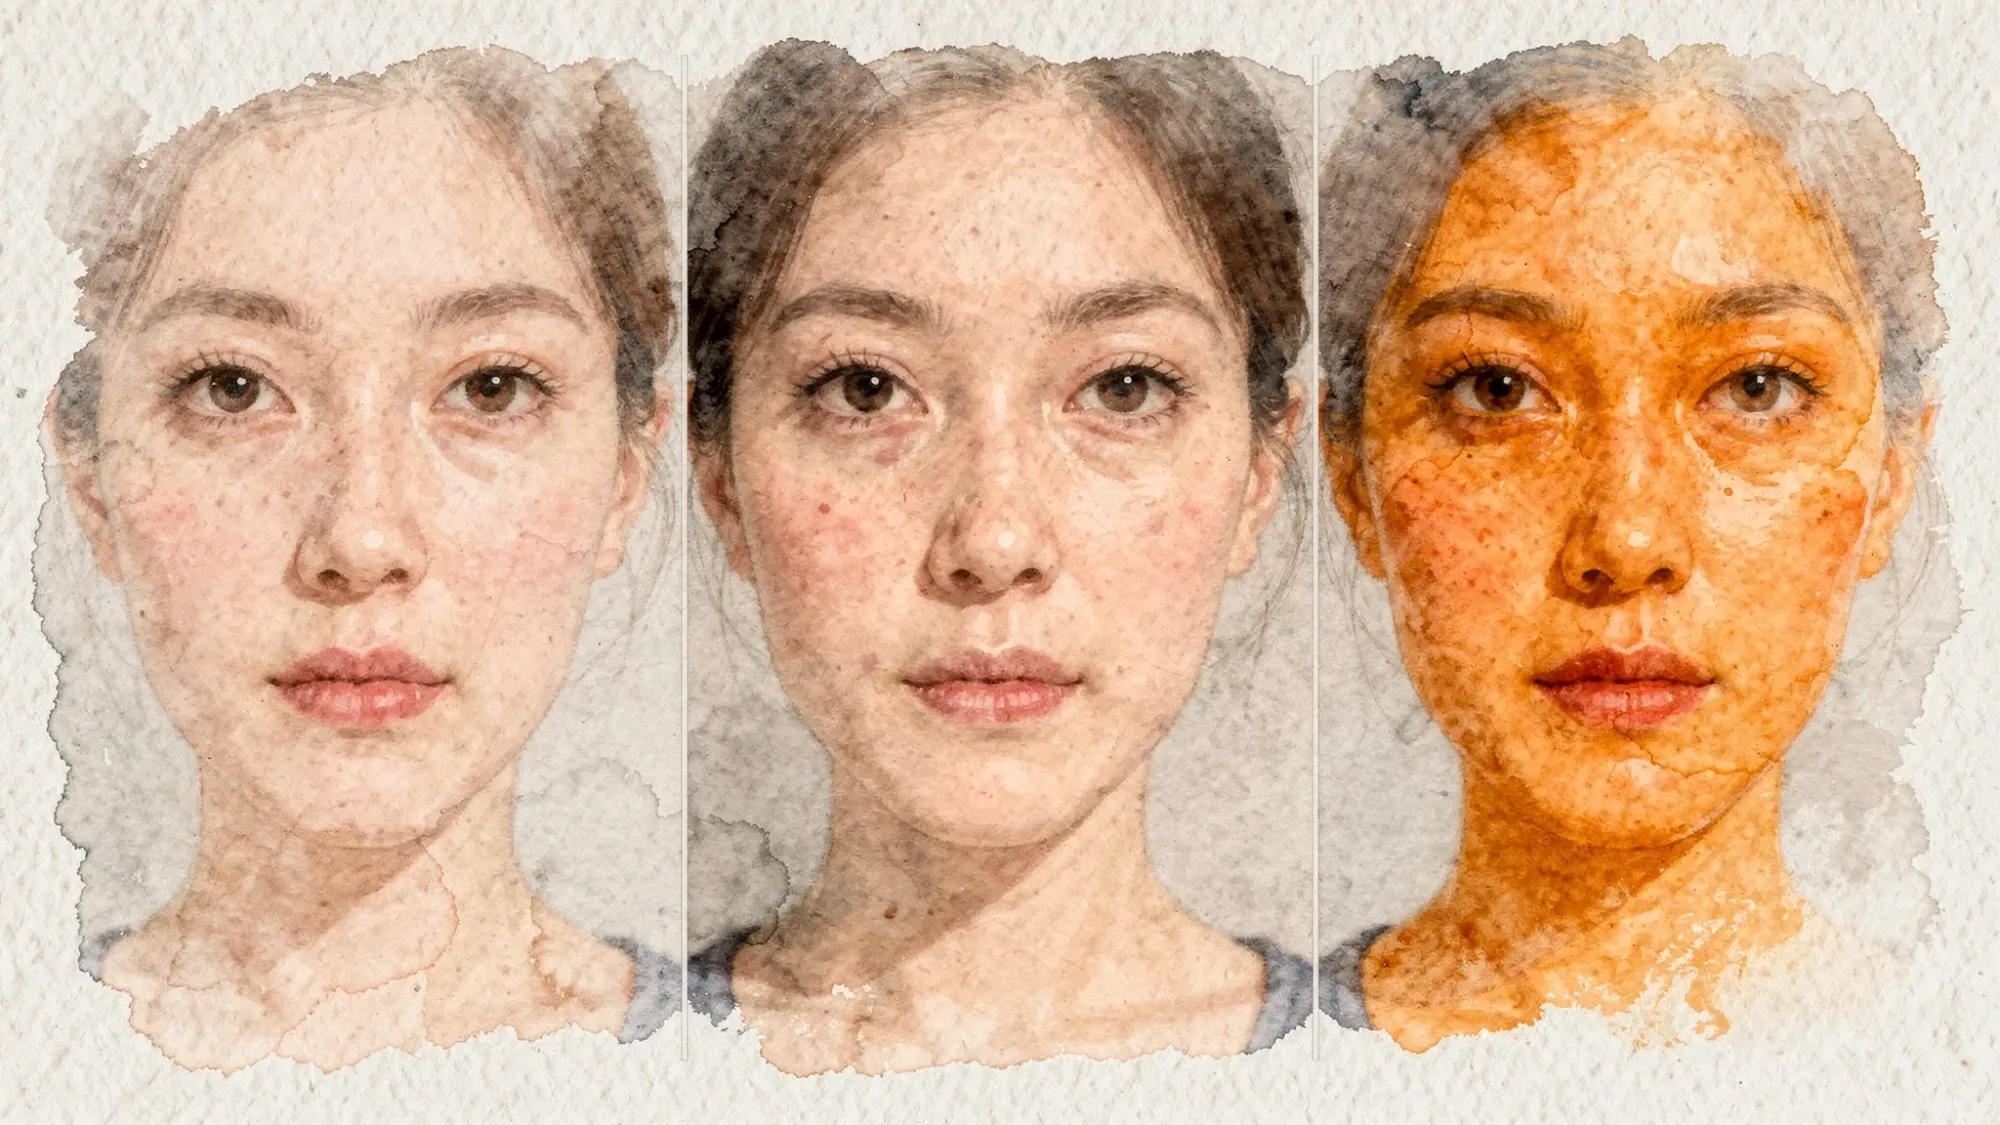
Why photos look “fake” so fast
A photo usually stops feeling natural when one of these is pushed too far:
- Clarity / structure / sharpness: creates crispy halos on faces and hair.
- Skin smoothing: removes pores and texture, especially in indoor light.
- Heavy color grading: makes skin tones drift orange, magenta, or gray.
- Over-HDR: brightens shadows so much the image looks flat.
Filters and editing can both cause these problems. The difference is how easy it is to control (and undo).
Camera app filter: what it is, and why it often looks less natural
A camera app filter is a preset “look” applied either:
- Live while you shoot, so you compose while seeing the effect
- Immediately after capture, sometimes baking the look into the saved file
Even when a filter is subtle, it is usually doing multiple things at once: contrast curve, saturation, hue shifts, sharpening, grain, vignette, sometimes skin changes.
When a camera app filter looks more natural
A filter can look natural when it is acting like a gentle finishing step, for example:
- Slight warmth or cooling to match the room
- A small contrast lift to reduce the “phone HDR” look
- A modest desaturation to keep reds from blowing out
In practice, “natural filter” usually means low strength, minimal skin processing, and controlled highlights.
When a camera app filter looks less natural
Filters tend to look artificial when:
- They clip highlights (white shirts, veils, stage lights)
- They shift skin tones (especially under mixed lighting at events)
- They add sharpening that is fine on buildings but harsh on faces
- They apply the same look to every scene, even when lighting changes
The biggest limitation is this: a filter cannot know what you meant.
At a wedding reception, for example, one frame might be backlit near a window, the next might be under warm uplights, and the next might be on a dark dance floor. A single camera app filter applied the same way across all three scenes can easily drift from “vibe” to “weird.”
Editing: why it usually wins for a natural look
Editing after capture is usually the more natural option because it is selective and reversible.
Instead of committing to a full “look” up front, you can make small corrections based on what the photo actually needs.
Natural editing is mostly correction, not transformation
A natural edit typically focuses on:
- Fixing exposure (too dark, too bright)
- Correcting white balance (too warm, too green)
- Recovering highlights (if the file allows it)
- Adding a touch of contrast without crushing shadows
- Light sharpening, light noise reduction
If you want to compare common mobile editors and what features they offer (RAW support, masking, retouching, presets), this overview of photo editing applications is a solid starting point.
A “natural edit” order that works reliably
You do not need a complex workflow to get natural results. A simple order helps you avoid overcorrecting:
| Step | Adjustment | What “natural” looks like | Common mistake |
|---|---|---|---|
| 1 | Exposure | Faces readable, background not nuked | Brightening everything until highlights blow |
| 2 | White balance | Whites look neutral, skin stays believable | Making indoor shots too cool or too orange |
| 3 | Highlights / shadows | Detail preserved, still looks like real light | Over-lifting shadows into flat HDR |
| 4 | Contrast | Slight depth, not harsh | Crushed blacks and crunchy faces |
| 5 | Color / saturation | Subtle, controlled reds | Over-saturation, especially lips and cheeks |
| 6 | Sharpen / noise | Clean but realistic texture | Over-sharpening and plastic smoothing |
If you stop after steps 1 to 3, you will already be ahead of most “filter-first” photos.
Camera app filter vs editing: which looks more natural?
Editing usually looks more natural because it is context-aware (you respond to the actual light and skin tones), while a camera app filter is context-blind (it applies a general style).
But filters can be the better choice when speed and consistency matter more than perfection.
Quick decision matrix
| Situation | Best choice | Why |
|---|---|---|
| You want the most natural skin and color | Edit later | You can correct mixed lighting and avoid baked-in smoothing |
| You need a consistent vibe across quick casual shots | Camera app filter (subtle) | Everyone gets a similar look with zero effort |
| Lighting changes a lot (indoors, DJ lights, windows) | Edit later | Filters tend to swing too warm/cool and clip highlights |
| You are collecting photos from many guests | Simplify capture, light editing later | Too many different filters makes the gallery look chaotic |
| You want a “film look” on purpose | Either, but keep it gentle | Strong film effects often read as artificial on faces |
How to keep photos natural when everyone is shooting
For weddings, parties, corporate events, and conferences, the challenge is not just “natural.” It is natural across a whole crowd of different phones.
Here are the practical rules that keep galleries believable.
1) Prefer “clean capture” over heavy in-camera looks
If you can influence guests at all, encourage:
- No beauty mode
- No extreme filters
- Use the main lens (often labeled 1x) in normal light
This gives you consistent, edit-friendly files.
2) If you do use a camera app filter, keep it boring on purpose
A filter that looks great on one person can look wrong on another. If you want “natural,” choose filters that do not heavily change hue.
A simple test:
- If the filter makes teeth or whites look tinted, it is too strong.
- If it makes skin lose texture, it is not natural.
- If it makes shadows glow, it will look HDR-ish in event lighting.
3) Use the same light strategy across the event
Natural-looking photos come from natural-looking light.
At events, the easiest win is to create one or two “good light zones” where people naturally gather (near a window, under consistent warm lighting, or in a simple lit corner). A good light zone does more for natural results than any app.
4) Make sharing automatic so you do not “post-edit” the story away
When photos get shared days later, people tend to over-edit because they are bored, scrolling, and trying to make something “pop.” That is when natural becomes stylized.
A better pattern is capture in the moment, upload automatically, then do a light curation pass.
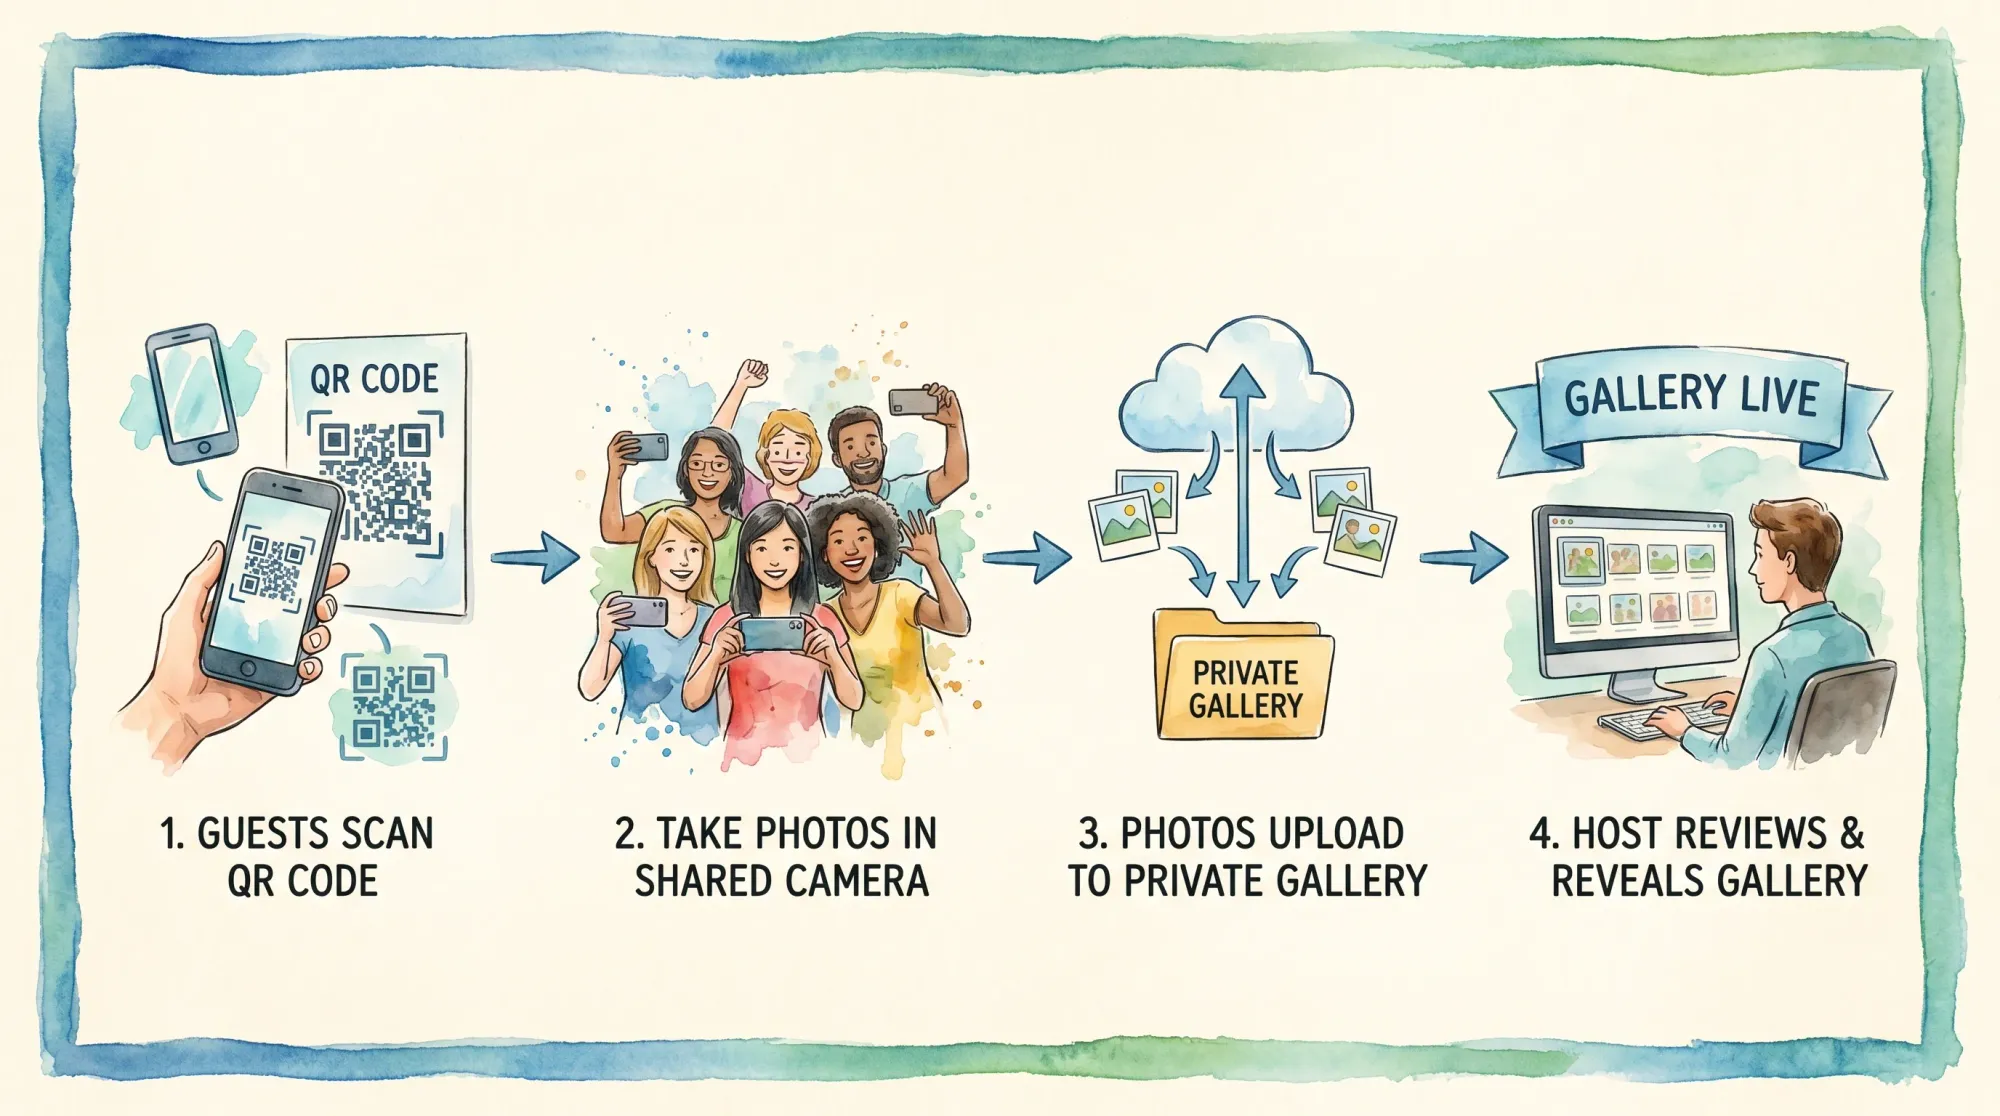
This is one reason event-specific tools like Revel.cam exist: guests scan a QR code or tap an NFC tag, take photos, and they upload to a private event gallery (a “Moment”) automatically, with host controls like photo limits, an end time, and review before sharing.
A realistic “natural look” workflow for event hosts
If your goal is a gallery that feels like the event (not like 40 different Instagram aesthetics), this workflow works:
Before the event: pick one guideline
Choose one sentence you can put on a sign:
“Take photos here, please avoid heavy filters.”
That is enough. You do not need to police people, you just need to set a norm.
During the event: reduce friction, increase participation
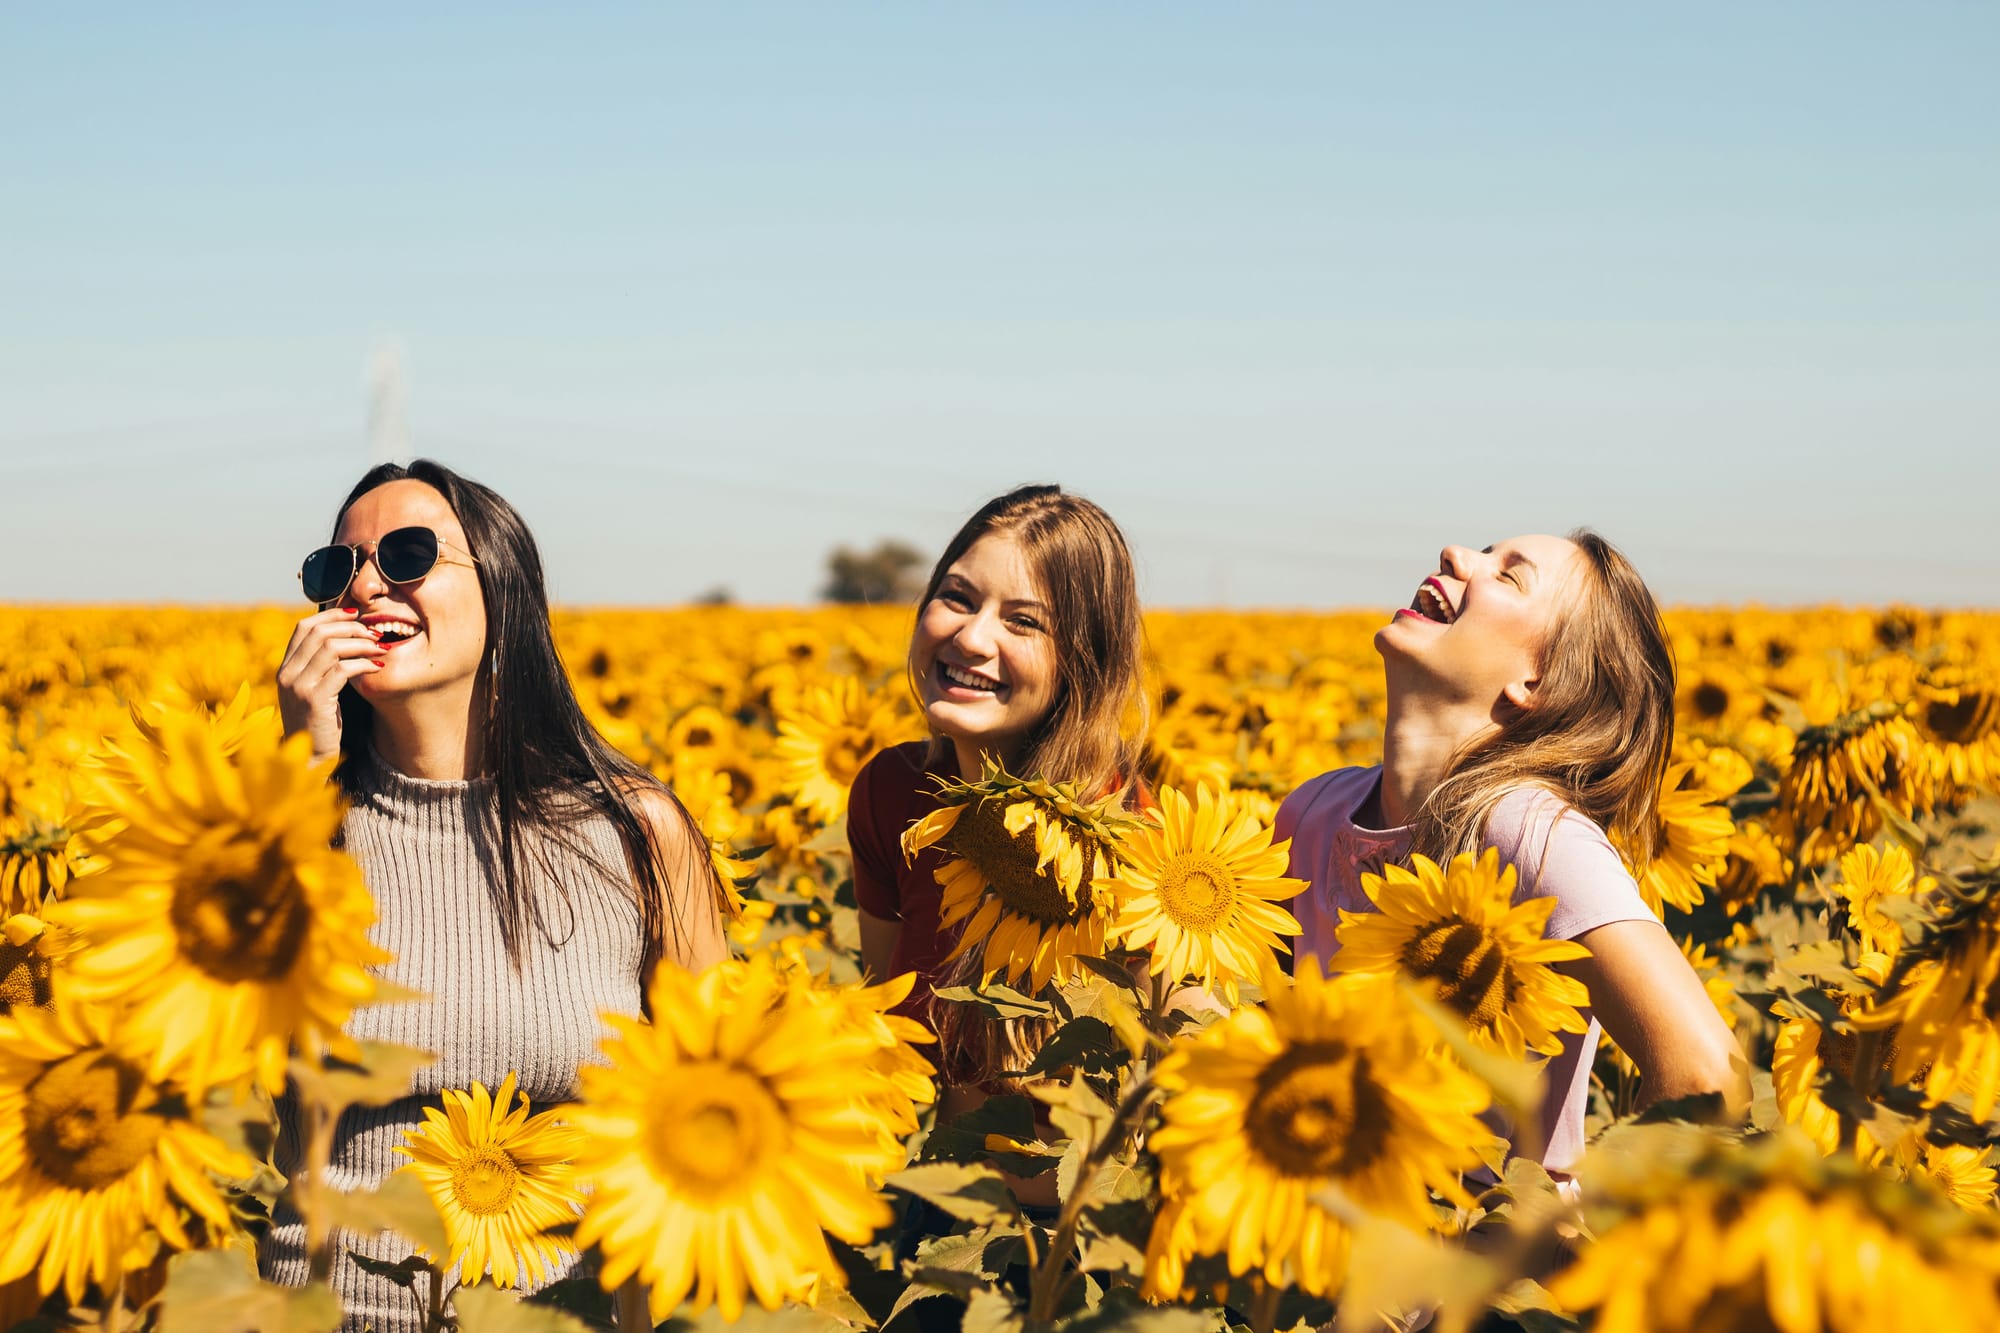
Natural photos come from real moments. You get more real moments when guests are not thinking about logistics.
A frictionless capture flow (scan, shoot, upload) increases the odds you get:
- candid laughter
- table reactions
- behind-the-scenes prep
- late-night dance floor energy
After the event: do small global edits, not dramatic makeovers
If you are curating a shared album:
- Fix exposure and white balance first
- Apply a very light, consistent look (or none)
- Avoid face retouching unless there is a specific reason (temporary blemish, distracting shine)
If you want a “signature” finish, apply it to highlights only, not every single frame.
Frequently Asked Questions
Do camera app filters reduce photo quality? Sometimes. Many filters are effectively presets applied to a compressed JPEG and can clip highlights or crush shadows. Even when quality is not technically reduced, a strong filter can remove detail (especially in skin) in a way that looks less natural.
Is it better to edit in Apple Photos / Google Photos or a dedicated app? For natural results, the built-in editors are often enough because they focus on core corrections (exposure, color, highlights/shadows). Dedicated apps are useful when you need finer control (selective edits, masking, consistent presets).
What is the fastest way to make a photo look natural? Correct white balance and bring highlights down slightly. Wrong color temperature is the #1 reason “normal” photos feel off.
Should I shoot RAW for a natural look? RAW can help preserve highlight detail and give more flexibility, but it is not required for natural photos. For most event guests, clean lighting and minimal processing matter more than file format.
How do I keep an event gallery consistent if guests use different filters? Ask guests to avoid heavy filters, then do light curation: remove the most extreme outliers and apply minimal, consistent corrections to your favorites. The less variation at capture, the more natural the full story feels.
Create a natural-looking event gallery, without chasing photos
If you are hosting a wedding, party, or corporate event, the most “natural” photos are usually the ones people take while they are actually living the moment. The hard part is getting those photos off phones and into one place.
With Revel.cam, you can create a private Moment and let guests scan a QR code (or tap NFC) to open the camera instantly and upload automatically, no app install or signup. You can set photo limits, choose an end time, review shots, then share a clean gallery that feels like the event, not a group chat dump.
If you want more real candids and fewer over-processed edits, start a Moment at Revel.cam.
A writer interested in connection, memory, and the everyday moments that matter more than we realize.
Tags: Photo filters , Photo editing , Disposable camera app , Vintage camera apps , iPhone Photography , Photography tips