Aisle Planner: Setup Tips to Run Your Wedding Like a Pro
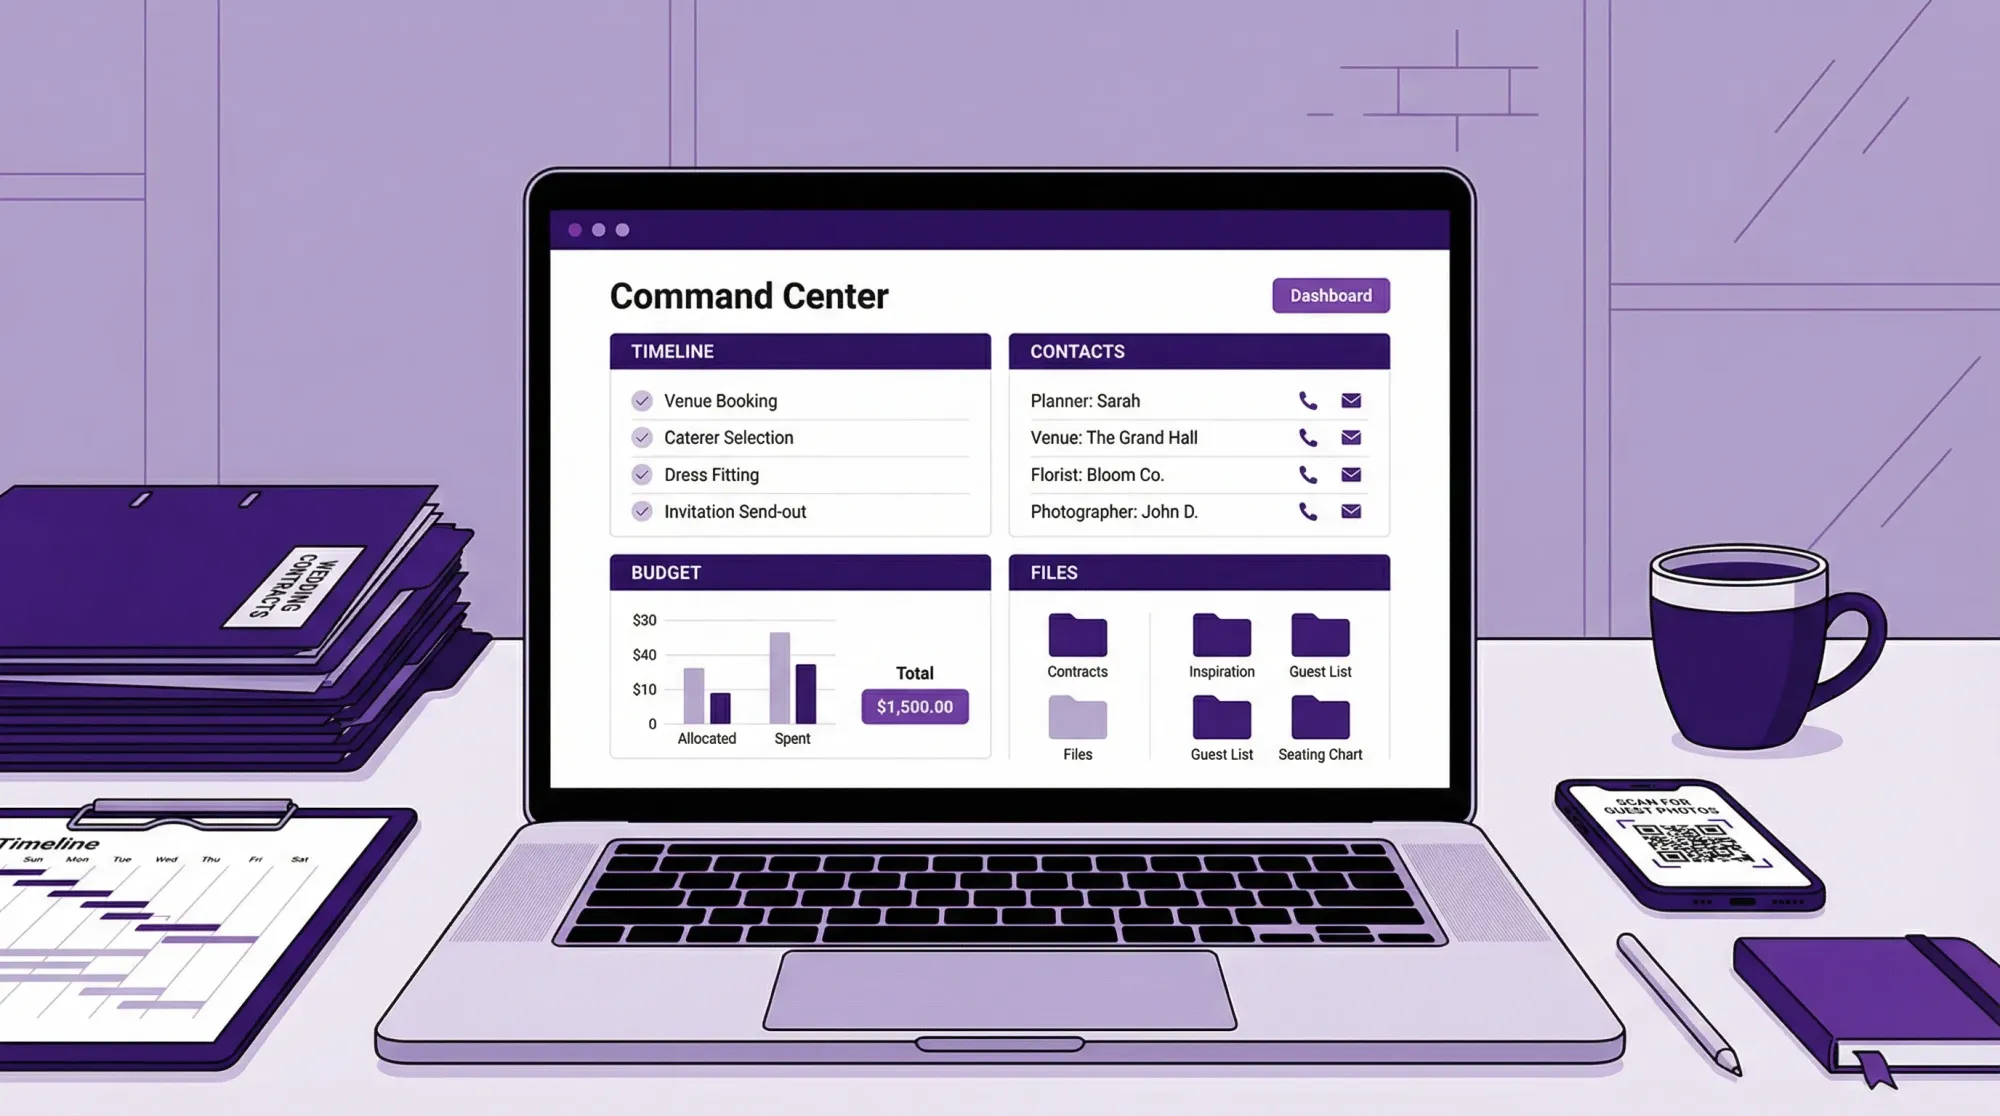
If you are using Aisle Planner (or working with a planner who does), the fastest way to “run your wedding like a pro” is to treat it like an operations hub, not a pretty checklist. Pros use one system to control four things: decisions, deadlines, documents, and day-of execution.
This guide focuses on setup choices that keep you out of spreadsheet chaos, reduce last-minute texts, and make it easy for vendors (and helpers) to do their jobs.
Start with the pro mindset: one source of truth
Most wedding stress comes from split-brain planning: a budget in one place, contracts in another, timelines in texts, and “final versions” floating around as PDFs.
Pick one home base (here, Aisle Planner) and make a simple rule:
- If it isn’t in Aisle Planner, it isn’t real.
That rule only works if your setup is consistent. Your goal is not to track everything, it’s to track the things that drive outcomes.
The 60-minute Aisle Planner setup that prevents 90% of mistakes
I am not going to assume specific Aisle Planner buttons or plan features, since accounts vary (couple vs planner-led workspaces). Instead, this is the structure to build inside whatever sections your workspace includes (projects, tasks, contacts, calendar, files, notes).
1) Define the “success definition” before you add tasks
Write a 6 to 10 line brief and paste it at the top of your project notes.
Include:
- Guest count range (example: 110 to 125)
- Ceremony type (religious, civil, outdoor, etc.)
- Top 3 priorities (example: food, dance floor, photography)
- Non-negotiables (example: live band, private vows)
- Two “we do not care” items (this prevents scope creep)
When you feel planning spiraling, come back to this brief.
2) Set owners for every workstream (even if you are DIY)
Pros avoid “someone should…” tasks. Everything needs an owner.
Create three default owners (these can be people or roles):
- Decision Owner (usually one partner)
- Logistics Owner (usually the other partner or planner)
- Approval Partner (the person who signs off within 24 hours)
Then add your support roles:
- Planner or coordinator
- Venue contact
- Maid of honor or best man
- Family point person (one, not four)
3) Build your planning system around workstreams, not vendor types
Vendor categories are useful, but workstreams are what keep you on schedule.
Use workstreams like these as top-level labels, tags, or groups:
- Budget and payments
- Guest experience and communications
- Design and decor
- Ceremony
- Food and beverage
- Music and flow
- Photo and video
- Logistics (rentals, transportation, lodging)
- Legal (license, insurance, permits)
Here is a quick map you can copy into your workspace.
| Workstream | What to track weekly | What to track monthly |
|---|---|---|
| Budget and payments | Upcoming deposits, balance due dates | Category targets vs actuals |
| Guest experience | RSVP count, dietary needs, VIP notes | Website copy, signage plan |
| Design and decor | Open decisions, mockups needed | Final quantities and layout |
| Music and flow | Timeline risks, special songs | Ceremony and reception cues |
| Photo and video | Shot list gaps, timeline windows | Contract deliverables and contacts |
| Logistics | Transport timing, weather plan | Rentals list and load-in plan |
4) Create naming rules (this is where “pro” shows up)
Use the same naming format everywhere: tasks, files, and notes. It makes search work, especially on your phone.
A simple convention:
- Tasks: Verb + deliverable + due date (example: “Approve ceremony music list (Apr 12)”)
- Files: Vendor + document + date (example: “Florist Proposal 2026-05-02.pdf”)
- Notes: Meeting type + vendor + date (example: “Call Notes: Photographer 2026-03-08”)
| Item type | Good example | Why it works |
|---|---|---|
| Task | “Submit final guest count to caterer (Jun 1)” | Clear deliverable, clear deadline |
| File | “DJ Contract 2026-02-14.pdf” | Searchable and sortable |
| Note | “Walkthrough: Venue 2026-05-10” | You can find it in seconds |
Build a timeline like a coordinator (not like Pinterest)
A pro timeline is not just a list of moments. It is a risk management tool.
Use three layers of time
Planning milestones (months out): big decisions and booking deadlines.
Production deadlines (weeks out): anything that requires vendors to order, print, or staff.
Day-of run of show (minutes): who is where, when, with what.
If your Aisle Planner workspace supports multiple calendars or views, keep these as separate views. If not, tag them so you can filter.
Put buffers where weddings actually break
Add explicit buffer blocks (not “free time”) around:
- Hair and makeup completion
- Travel to ceremony
- Post-ceremony receiving line or hugs
- Room flip (if ceremony and reception share space)
- Sunset photo window
- Toasts (they always run long)
A simple rule planners use: if a block involves people moving, add buffer.
Protect the photo timeline without turning your day into a shoot
Most couples either under-plan photos (missed shots) or over-plan (no breathing room). Instead, create two protected windows:
- A must-capture window for family and wedding party
- A candid capture window where nothing is scheduled tightly (cocktail hour is ideal)
If you want a deeper framework for this, Revel.cam has a practical “coverage model” you can borrow: Wedding Photos: A Simple Plan to Avoid Missing Key Moments.
Turn your vendor list into a command center
A pretty contact list is not enough. Pros track three things for every vendor: obligations, dependencies, and day-of access.
For each vendor, store these “never scramble” fields
Even if Aisle Planner has structured fields, you can also paste this at the top of the vendor notes.
- Best day-of phone number
- Who is onsite (name + number)
- Load-in time and door/location
- Power needs (if relevant)
- Final payment amount and due date
- Certificate of insurance requirement (yes/no, due date)
- Cancellation and overtime terms (short summary)
Add a dependency note (this prevents domino problems)
Write one line: “This vendor depends on…”
Examples:
- Florist depends on final guest count, table count, and floor plan
- DJ depends on ceremony cues, toasts list, and grand entrance names
- Caterer depends on rentals, timeline, and dietary list
Dependencies are where weddings go sideways. Making them explicit is a pro move.
Create a decision workflow (so you stop revisiting choices)
Pros do not let decisions reopen every time someone sends a new idea.
Use a “decision log” with three statuses
Create a simple table in your notes:
| Decision | Status | Deadline | Final answer lives here |
|---|---|---|---|
| Bridesmaids dresses | Shortlist | Apr 5 | Link/file |
| Ceremony processional order | Locked | May 20 | Run of show |
| Signature cocktails | Pending | Jun 1 | Bar menu file |
Statuses:
- Pending (not started)
- Shortlist (2 to 3 options only)
- Locked (no more debate unless budget or venue forces it)
Set an approval SLA (service-level agreement)
This sounds corporate because it is, and it works.
Agree that:
- Any approval request gets a yes/no within 24 hours.
- If no response, it defaults to the option that keeps the timeline safe (usually “approve” or “go with vendor recommendation”).
This one habit eliminates a shocking amount of planning friction.
Run communications like weekly standups
A wedding planning tool is only as good as your cadence.
Keep one weekly meeting, even if it is 15 minutes
Same day, same time, same agenda.
A tight agenda template:
- New decisions needed (max 3)
- Upcoming deadlines in the next 14 days
- Budget changes since last week
- Risks (anything that could break timeline, budget, or guest experience)
Put the agenda in Aisle Planner notes and duplicate it each week.
Use the “one message rule” for vendors
Instead of multiple texts and emails, keep a single running vendor thread per vendor, and paste key decisions back into your planning notes.
The goal is that if someone new joins (assistant planner, day-of coordinator), they can understand the state of play in 5 minutes.
Day-of operations: build a run of show that other people can execute
Your run of show should work even if you are busy, emotional, or unavailable.
A coordinator-grade run of show includes owners
For each segment, assign an owner and a “success condition.”
| Segment | Owner | Success condition |
|---|---|---|
| Vendor load-in | Planner/Coordinator | All vendors onsite and set by deadline |
| Ceremony lineup | Coordinator + wedding party lead | Everyone in correct order, phones silent |
| Grand entrance | DJ/MC | Names correct, timing aligned with kitchen |
| Toasts | Planner + DJ | Mic ready, speakers queued, toast list capped |
| End of night | Venue + coordinator | Items packed, tips delivered, no lost cards |
Build two versions: full and “pocket”
Pros carry a short version.
- Full version: everything, shared with vendors and coordinator
- Pocket version: the next 3 hours only, used by you and your VIP helpers
If Aisle Planner allows exports or printable views, use them. If not, paste the pocket version into a note that is easy to open on mobile.
Add a “memories layer” to your plan (so photos do not scatter)
Even very organized couples lose guest photos because collection is treated as an afterthought.
If you want to run this like a pro, make guest photos an actual workstream with tasks, owners, and a day-of deployment plan.
The pro goal: frictionless capture during the wedding, not uploads after
The highest-participation approach is camera-first:
- Guest scans a QR code (or taps NFC)
- Camera opens immediately
- Photo uploads automatically into one private event gallery
That is exactly what Revel.cam is built for: you create a private Moment, guests join with no app install or signup, and the gallery is revealed when the Moment ends.
If you want a plug-and-play timeline and checklist you can drop into your planning workspace, use: Wedding Planning Tool: The Guest Photo Collection Plan (Checklist + Timeline).
How to integrate this into your Aisle Planner setup
Add these tasks under Photo and video or Guest experience:
- Create your Revel.cam Moment (owner: Logistics Owner)
- Set guest limits and end time (owner: Decision Owner)
- Print QR table tents and a welcome sign (owner: Planner or helper)
- Place QR codes at 3 to 5 touchpoints (owner: coordinator)
- Give DJ/MC a one-sentence announcement (owner: coordinator)
- Assign a “Photo Captain” to prompt early participation (owner: MOH/BM)

Final audits that make you look effortless
Two weeks out: the “dependencies” sweep
Review every major vendor and confirm:
- They have the latest timeline
- They have the right address and load-in instructions
- They have final quantities (or the date they will receive them)
- They know who they report to onsite
This is also the time to confirm who is holding:
- Marriage license items
- Vendor tips
- Emergency kit
- Extra signage and printed copies
72 hours out: the “day-of access” sweep
Text (or email) a single message to every key vendor contact:
- “Here is the final run of show and my day-of contact. Please reply OK so we know you have it.”
You are not being annoying, you are closing the loop.
Where Aisle Planner shines (and where you should keep it simple)
Aisle Planner is often used by professionals because it can centralize planning operations. Your win comes from not overbuilding.
Keep it simple:
- Use Aisle Planner for planning truth (tasks, contacts, timeline, documents)
- Use vendors for expertise (let them propose, you approve)
- Use one frictionless system for guest memories (so you do not chase uploads later)
If you set up clean workstreams, name things consistently, and assign owners, you will feel the difference immediately.
When you are ready to lock in the guest photo piece, you can create a Moment in minutes at Revel.cam and add it to your Aisle Planner timeline as a real deliverable, not a “nice to have.”

A writer interested in connection, memory, and the everyday moments that matter more than we realize.
Tags: Aisle Planner , Wedding planning , Wedding planning app , Affordable wedding planning , Wedding planning tool