Wedding Planning Tool: Build a Guest Photo Plan That Works
Wedding photos tend to split into two worlds: the polished story from your photographer and the candid, in-between moments living on dozens of phones. The problem is not that guests do not take photos, it is that those photos rarely make it back to you in a complete, organized way.
A guest photo plan solves that. Think of it as the part of your wedding planning tool that answers three practical questions:
- What do we want guests to capture?
- How will those photos be collected with minimal friction?
- When and how will we share the gallery afterward?
Done well, it increases coverage, reduces awkward follow-ups, and keeps your memories in one place.
Step 1: Define what “success” looks like for guest photos
Before you choose a platform or print a QR sign, decide what you actually want from guest photos. Couples often skip this and end up with a random pile of duplicates and missing moments.
A useful way to frame success is by choosing your primary goal:
Goal A: More angles and candid moments
This is the most common goal. You already have a professional, but you want:
- Guest POV during cocktail hour
- Behind-the-scenes moments while you are elsewhere
- Dance floor energy
- People you did not get to talk to much
Goal B: A time-boxed story of the day
Some couples prefer guest photos to feel like a “complete roll,” similar to disposable cameras. In that case you will want clear boundaries, like an end time and a per-guest photo limit.
Goal C: A private, curated gallery
If privacy matters (and for many weddings, it does), define what “private” means to you:
- Only invited people can upload
- You can review images before sharing
- The gallery is not publicly searchable
Write your goal into your wedding notes. It will guide every decision that follows.
Step 2: Assign coverage so guests complement your pro, not compete with them
A guest photo plan works best when it fills gaps instead of duplicating what your photographer is already doing.
Start by listing the parts of the day your photographer is likely focused on (ceremony, portraits, key reception events). Then identify the “high-value gaps” guests can capture.
Common high-value gaps include:
- Getting-ready moments in the other suite
- Cocktail hour mingling while you are doing portraits
- Table photos, especially with extended family
- Afterparty and late-night moments
If you are working with a planner, ask them where they typically see coverage gaps. If you are DIY planning, ask your photographer what they usually miss due to timeline constraints.
Step 3: Map your guest photo moments to the wedding timeline
Once you know what you want, translate it into a timeline-based plan. This makes it easy to communicate and easy to execute.
Here is a template you can copy into your wedding planning tool.
| Part of day | Moments guests are great at capturing | How to prompt it (simple cue) |
|---|---|---|
| Pre-ceremony | Friends arriving, venue details, flat-lay of invites/programs | “Scan and snap your arrival” |
| Ceremony (pre) | Processional buildup, parents reactions | “Photos before the ceremony begins” |
| Cocktail hour | Candids, group selfies, food and drink moments | “Cocktail hour candids” |
| Reception (early) | First table visits, speeches reactions | “Capture your table and your favorite toast moment” |
| Dance floor | Short bursts of dancing, funny moments | “10 dance floor shots only, make them count” |
| Afterparty | Small groups, late-night energy | “Afterparty is live until midnight” |
Two practical notes:
- Avoid prompting during the ceremony itself unless your venue and photographer are comfortable with it. Many couples prefer guests to stay present.
- Keep prompts short. Guests will not read paragraphs.
Step 4: Choose a collection method that guests will actually use
Most wedding photo collection fails for one reason: friction. If guests have to download an app, create an account, or remember to upload later, participation drops.
Below is a realistic comparison of common approaches.
| Method | What it’s good for | Where it breaks down |
|---|---|---|
| Group chat (iMessage/WhatsApp) | A few quick highlights | Compresses quality, gets chaotic fast, hard to organize |
| Shared albums (iCloud/Google Photos) | Familiar to some guests | Requires setup, not everyone uses the same ecosystem |
| AirDrop | Fast in the moment | Only works nearby, requires coordination, easy to forget |
| Disposable cameras | Nostalgic vibe, intentional shots | Film development logistics, no instant backup, costs add up |
| QR-based shared camera | High participation, instant upload, centralized gallery | Requires signage and a clear “how to join” cue |
If you want the simplest guest experience, QR-based capture is usually the most reliable. Guests already understand scanning a QR code, and it keeps the “upload” step from becoming tomorrow’s problem.
Where Revel.cam fits (and what to look for in any tool)
If you are evaluating a wedding planning tool for guest photos, prioritize these requirements:
- No app install or login for guests
- Instant upload into one private event gallery
- Host controls, like review and removal of images
- Boundaries, like per-guest limits and an end time
Revel.cam is designed around those constraints: guests join by scanning a QR code (or tapping an NFC tag) and take photos that upload automatically to your wedding’s private gallery. On iPhone, it can launch as an App Clip, which is built specifically for lightweight, instant experiences without a full app install (see Apple’s overview of App Clips).
Step 5: Design the guest experience, signage, placement, and wording
The best guest photo plan is the one your guests understand in three seconds.
Make “how to participate” obvious
Do not hide the QR code on a crowded program page. Put it where people naturally pause.
High-performing placements:
- Welcome table
- Bar signage
- Each reception table
- Near the guest book
- On escort card display
If you are using NFC tags, place them where someone can easily tap with their phone, like a small sign stand or a card at each table.
Use one clear line of copy
Guests do not need an explanation of your system. They need a prompt.
Examples that tend to work:
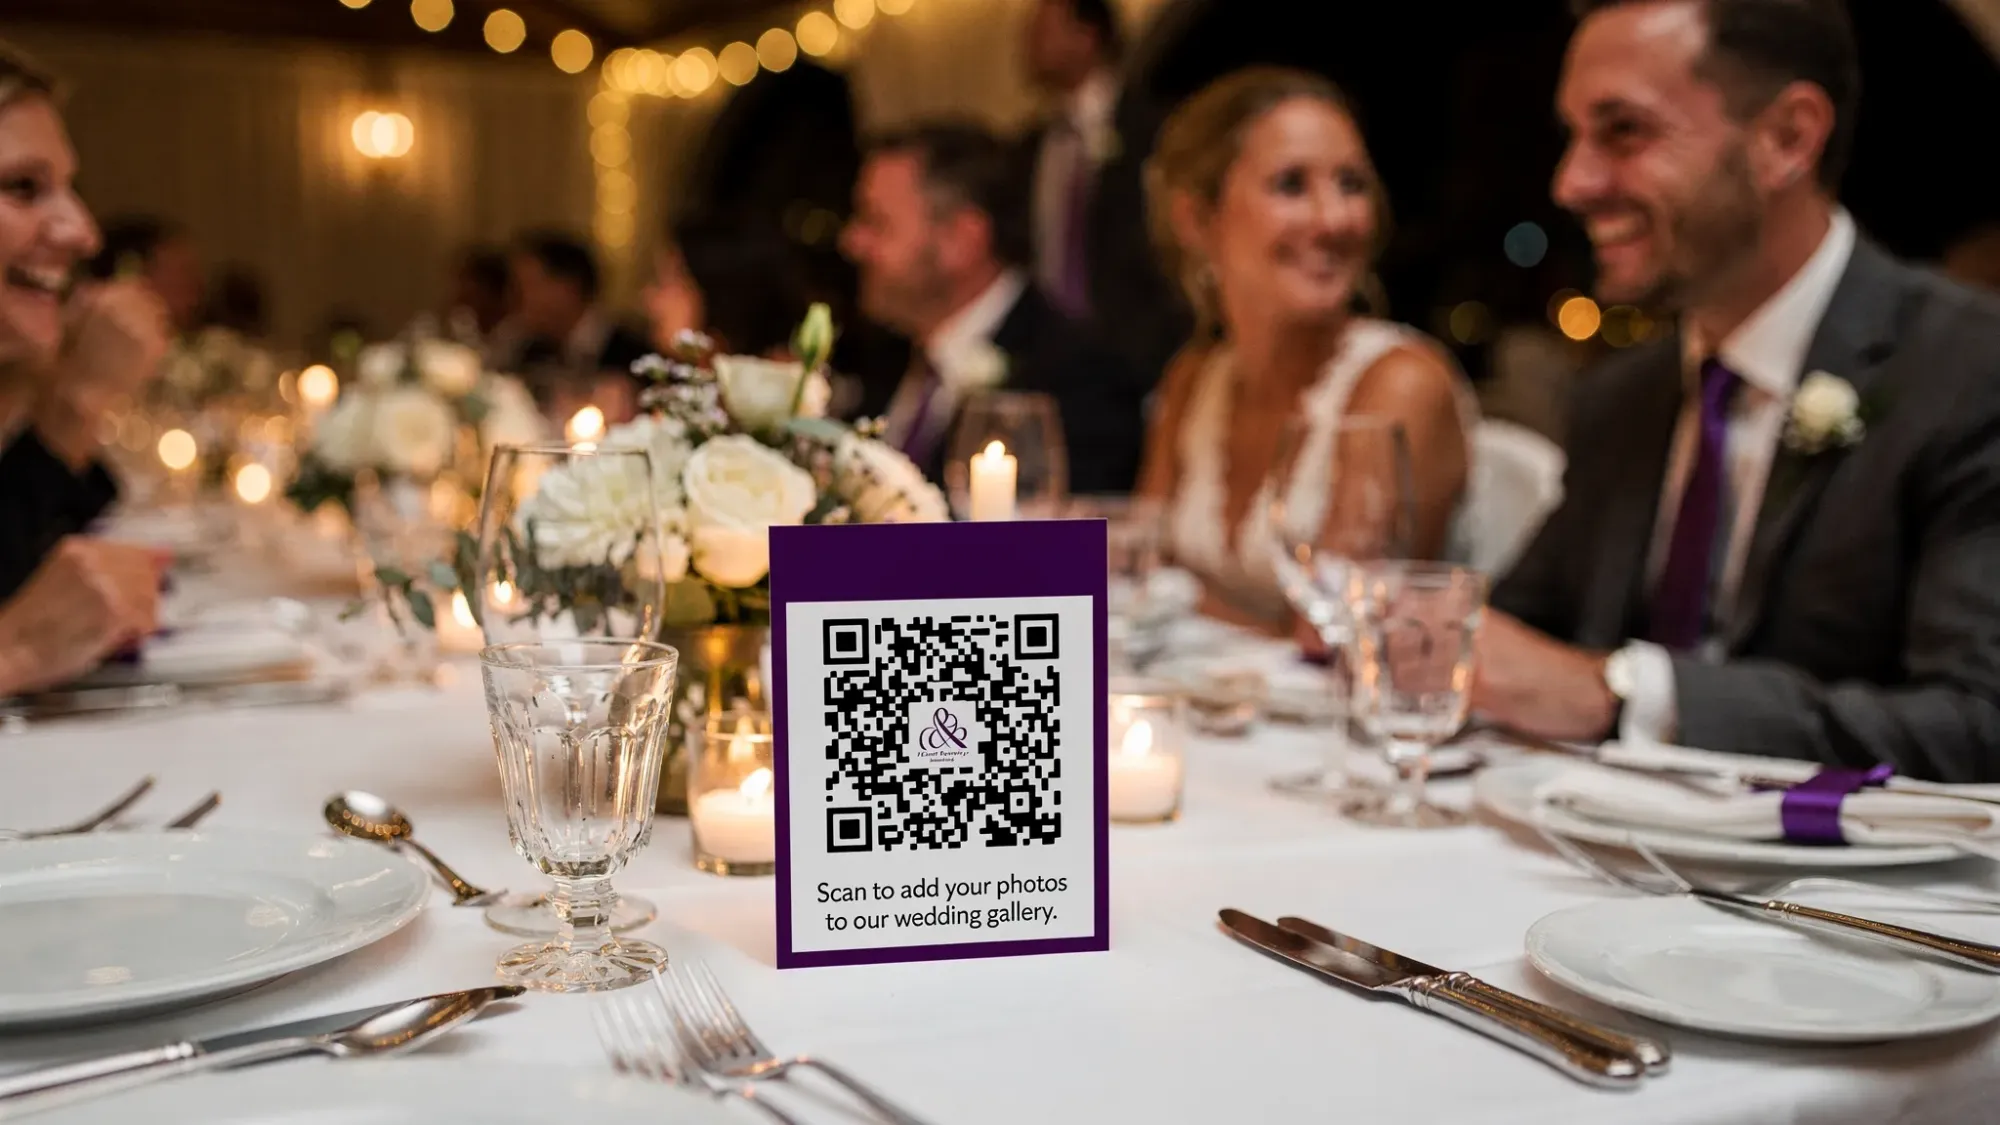
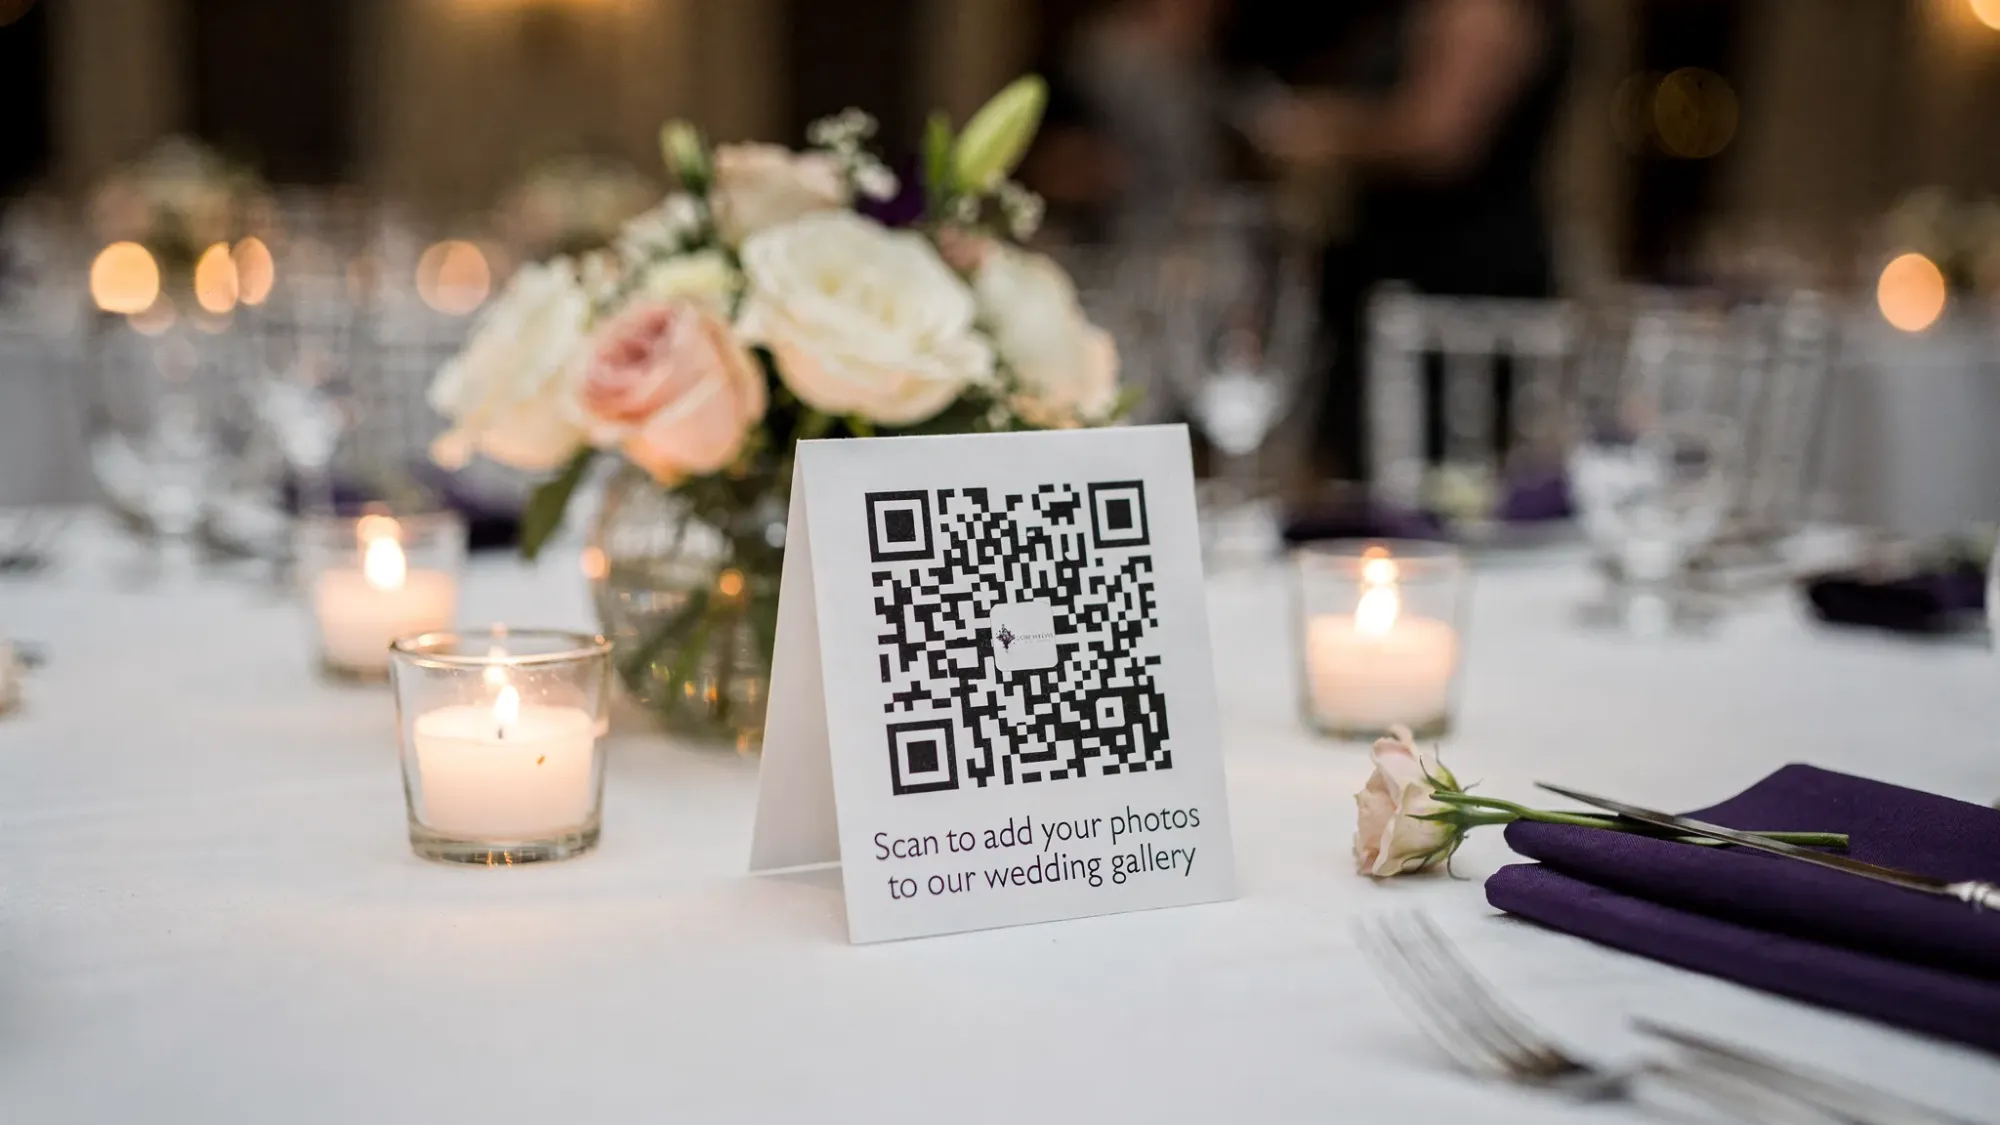
- “Scan to add your photos to our wedding gallery.”
- “No app, no login. Just scan and snap.”
- “Help us capture the day from your perspective.”
If you want a “disposable camera” feel, add a constraint right on the sign:
- “You get 10 shots. Make them count.”
That single line changes behavior more than you would think.
Confirm scanning will be easy
Most guests can scan QR codes using the built-in camera app on modern phones. Apple documents how QR scanning works on iPhone in its iPhone User Guide. If you are planning signage, test it at realistic distance and lighting, especially for dim reception spaces.
Step 6: Add boundaries that improve quality (and reduce chaos)
An underrated part of a guest photo plan is deciding what you will not allow. Boundaries are not about being strict, they are about keeping the gallery meaningful.
Set a per-guest photo limit
Limits help in three ways:
- Guests take more intentional photos
- You reduce near-duplicates (especially table selfies)
- You keep the gallery reviewable after the wedding
Revel.cam lets hosts set a maximum number of photos per guest, which is useful if you want that curated, disposable-camera vibe without the film logistics.
Set an end time
An end time creates a clean “moment” boundary, and it prevents late uploads that do not match the event (or that you would rather not moderate at 2 a.m.).
A practical approach:
- End at the scheduled reception end time, or one hour after if you have an afterparty
- If you have a welcome party or day-after brunch, create separate collections so each part of the weekend tells a clearer story
Decide who sees the gallery and when
Some couples want guests to see the gallery immediately. Others want to review first.
If you are privacy-minded, choose a workflow that supports:
- Host review before sharing
- Removing unwanted images
- Keeping the gallery event-only and not publicly indexed
This is an area where tools vary a lot, so confirm it before you commit.
Step 7: Plan the post-wedding flow (so it does not become another chore)
Guest photos are only valuable if you can access and share them easily after the wedding.
Before the day, decide:
Where the “final gallery” will live
You want one destination you can point everyone to, instead of multiple threads and albums. If you are using Revel.cam, the photos live in your Moment gallery, and you can choose when it is revealed to guests.
When you will share it
Pick a date while you are still in planning mode. For example:
- “We’ll share the guest gallery the week after the wedding.”
That expectation reduces follow-up messages and keeps the experience tidy.
How it fits your other deliverables
If you are sending thank-you notes, guest photos can help you personalize them. A candid picture of someone laughing at your reception is often more meaningful than a generic message.
A simple “Guest Photo Plan” you can paste into your wedding planning tool
Use this as a one-page plan you and your planner (or day-of coordinator) can follow.
Responsibilities
| Task | Owner | Deadline |
|---|---|---|
| Choose guest photo collection method | Couple | 6 to 8 weeks out |
| Create QR code signage (tables, bar, welcome) | Planner or couple | 2 to 3 weeks out |
| Test scanning in low light | Couple | 1 week out |
| Place signage at venue | Planner or coordinator | Day-of setup |
| Decide moderation and gallery reveal timing | Couple | Before wedding day |
| Share final gallery link/message | Couple | 3 to 10 days after |
Settings to decide (write them down)
- Photo goal: candid coverage, time-boxed story, or curated private gallery
- Per-guest limit (if using it): ____ photos
- Moment end time: ____
- Gallery reveal: immediately or after review
Bringing it all together with Revel.cam (optional, but worth considering)
If your biggest concern is participation, the core obstacle is usually friction. Revel.cam is built to remove the steps that guests skip: no app install, no accounts, no “send it later.” Guests scan a QR code (or tap NFC) and take photos that upload automatically into one private event gallery.
If you want to see whether it fits your wedding photo plan, you can explore how Moments work on Revel.cam.
The best guest photo plan is not the most complicated one, it is the one your guests can join instantly, use naturally, and that leaves you with a gallery you will actually want to revisit.

A writer interested in connection, memory, and the everyday moments that matter more than we realize.
Tags: Affordable wedding planning , Wedding planning , Wedding planning app , Wedding planning tool , Guest photo album , Guest photo sharing , Wedding guest photos , Wedding app , Wedding photos , Wedding photo sharing