Guest Camera for Events: How to Collect Photos Without Apps

If you have ever hosted an event, you already know the pattern: guests take great photos, then everyone forgets to send them, someone drops a 200-photo dump in a group chat, and half the best moments live on a phone you will never see again.
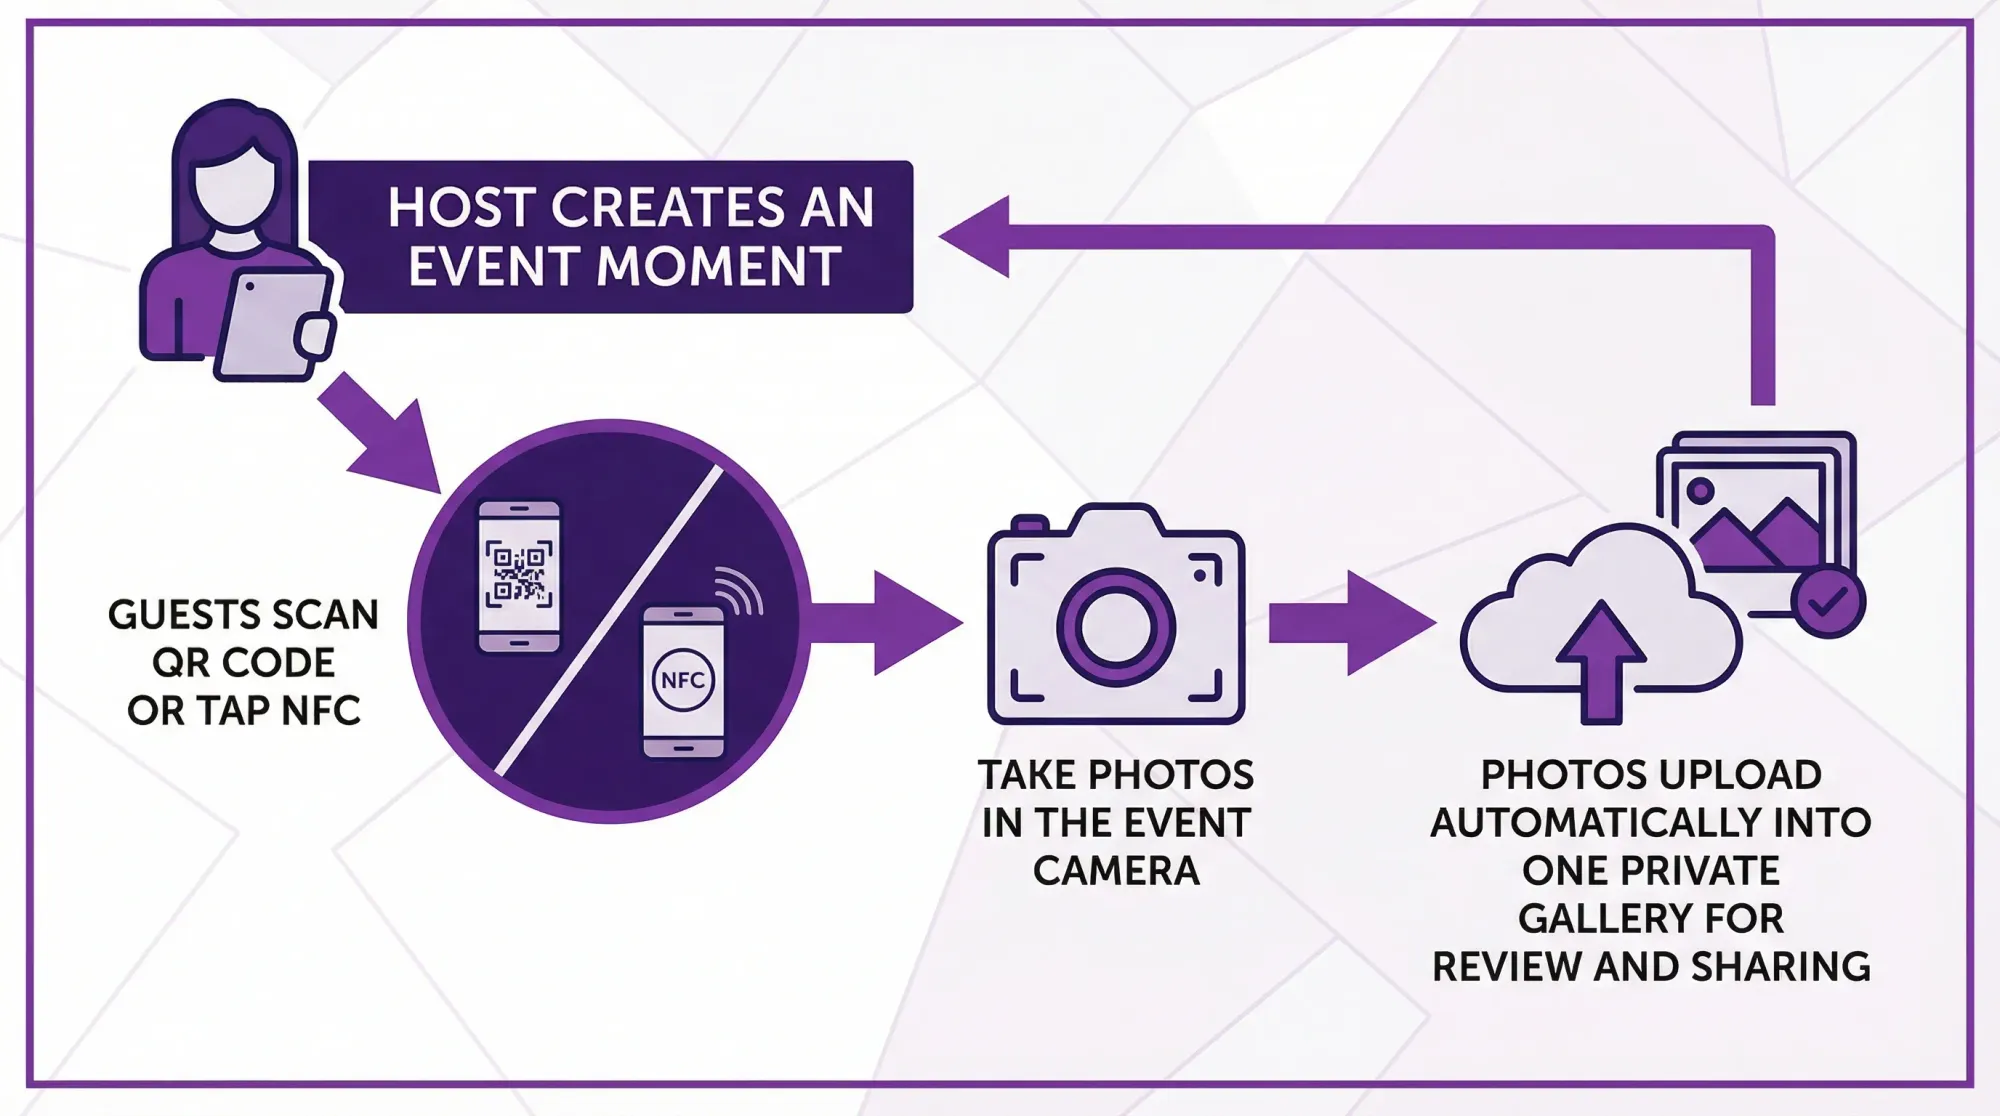
A guest camera solves this by turning your event into a shared camera experience. Guests scan a QR code (or tap an NFC tag), take photos, and those photos upload automatically into a single private event gallery, with no app install and no account.
What a “guest camera” actually means
A guest camera is an event-first photo workflow designed around real guest behavior:
- Guests will scan something in front of them.
- Guests will not reliably download an app, create a login, or remember a shared album link.
- Hosts need one place where everything lands, plus guardrails.
Instead of asking people to “share later,” a guest camera makes photo sharing part of the moment itself.
Why “no app required” is the difference between 20 photos and 400
Most photo-collection plans fail at the first step: adoption.
Every extra hurdle reduces participation:
- App store download
- Account creation
- Permissions, onboarding, and notifications
- Figuring out where to upload
On iPhone, some guest camera tools can launch as an App Clip, a lightweight Apple experience that opens immediately from a QR code without a full install. (Apple’s overview: App Clips.)
The practical result is simple: more guests actually contribute because the camera opens fast and feels familiar.
Common ways to collect event photos (and where they break)
Most hosts pick one of these four options, then spend the week after the event chasing people.
| Method | What guests must do | What usually goes wrong | Best for |
|---|---|---|---|
| Group chat (SMS, WhatsApp, etc.) | Remember to send, avoid spamming | Chaos, compression, duplicates, missing photos | Small casual hangouts |
| Shared iCloud/Google album | Sign in, accept invite, upload | Low participation, cross-platform friction | Groups that already share albums |
| Upload folder (Drive/Dropbox link) | Open link, upload manually | Feels like homework, uploads happen late or never | Teams used to file workflows |
| Social hashtag | Post publicly, use correct tag | Privacy issues, missing posts, hard to download full set | Public-facing brand moments |
| Guest camera (QR/NFC, camera-first) | Scan or tap, then shoot | Requires decent signage and a quick announcement | Weddings, corporate events, parties, conferences |
If your goal is “collect the most photos with the least guest effort,” guest camera wins because it removes the post-event chore.
What to look for in a guest camera tool
Not every QR photo link is a true guest camera. The difference is whether the experience is designed around fast capture and host control.
1) Camera-first flow (not upload-first)
A strong guest camera opens directly to a camera interface so guests can take photos immediately, rather than navigating a form or choosing files to upload.
2) Multiple ways to join: QR, NFC, and link
QR codes are the default because everyone recognizes them and most phone cameras scan them natively.
NFC is even faster in high-traffic moments (tap and go), and a link is a useful backup for remote guests or signage that gets missed.
3) Guardrails that keep the gallery usable
The best systems let hosts set:
- A per-guest photo limit (helps reduce noise and duplicates)
- A Moment end time (prevents late, off-topic uploads)
- A guest cap (useful for private or ticketed events)
4) Host review and moderation
For weddings, this is about avoiding accidental photos.
For corporate events, it is about brand safety and consent. If you are hosting a work event, look for moderation controls and a private-by-default gallery workflow.
5) A clear “gallery reveal” plan
Some events want live viewing, others want a next-day reveal. The tool should support the experience you want, not force the social-feed model.

How to collect photos without apps: a simple guest camera setup
This is a practical, event-day-friendly workflow you can use for weddings, parties, and corporate events.
Step 1: Decide what success looks like
Before you create anything, answer two questions:
- Do you want candids, group photos, behind-the-scenes, or all of the above?
- Do you want guests to see photos immediately, or do you want a reveal after the event?
These two answers determine your settings, signage, and where you place join points.
Step 2: Create your event and set basic guardrails
In Revel.cam, you create an event called a Moment and choose:
- How many guests can join
- How many photos each guest can take
- When the Moment ends
Then you share access via QR code, NFC tag, or link.
A simple starting point for many events is a modest per-guest limit that encourages intentional shots, plus an end time that lines up with the event’s natural finish.
Step 3: Place join points where people already pause
You want guests to scan when they are already standing still for 5 to 10 seconds.
High-conversion placements include:
- Welcome sign (first 10 minutes matter)
- Bar area (people wait, lighting is often decent)
- Table tents (guests are seated and relaxed)
- Photo moment zones (guest book, backdrop, dessert table)
- Badge area at conferences (natural “check-in” behavior)
If you only put one QR code on a table, many guests will never notice it. Redundancy beats perfection.
Step 4: Make one short announcement (then stop talking about it)
Your announcement should be 10 to 15 seconds, and it should remove uncertainty.
Example:
“Scan the QR code on your table to open our event camera. No app, no login. Every photo you take uploads automatically to our shared gallery.”
That is enough. If you over-explain, it sounds complicated.
Step 5: Add lightweight prompts to improve photo quality
Guests often default to random snapshots unless you give them a tiny nudge.
Try one prompt per area, like:
- “Take one photo of your table.”
- “Catch someone laughing.”
- “Get one dance floor photo.”
- “Snap the best candid you see tonight.”
Prompts work especially well when you also set a photo limit, because people become more intentional.
Privacy, consent, and brand safety (especially for corporate events)
Collecting guest photos is easy, but you still need a clean consent posture.
Good practices include:
- Use signage that makes it clear photos go to a shared event gallery.
- Avoid placing join points in sensitive areas.
- Consider host review before sharing widely.
For guidance on event privacy expectations, you can reference general principles from organizations like the Federal Trade Commission (US) when thinking about transparency and user expectations, especially in a workplace context.
Troubleshooting: the issues that actually happen on event day
“The QR code won’t scan”
Usually this is a print or placement issue.
- Ensure strong contrast (dark code on light background).
- Avoid glossy reflections.
- Print bigger than you think you need.
- Add a short backup link under the QR.
“People say they’ll do it later”
That is exactly what you are trying to avoid.
Fix: move the join point earlier, then make the first scan part of arrival (welcome sign, check-in, first drink).
“Photos are blurry on the dance floor”
That is normal in low light.
Fix: put one prompt on the signage: “Use flash on the dance floor” or “Hold still for a beat.”
“Wi‑Fi is spotty”
You do not need perfect Wi‑Fi everywhere, but you do need guests to be able to join.
Fix: test join points in the exact locations, not just near the entrance. If one area is dead, relocate signage to a better spot (bar, lobby, near windows).
Why Revel.cam fits the “guest camera” use case
Revel.cam is built specifically for app-free event photo collection:
- Guests join by scanning a QR code, tapping an NFC tag, or opening a link.
- On iPhone, it can launch as an App Clip for fast access without a full install.
- Photos upload automatically into a single private Moment gallery.
- Hosts can set guest limits, photo limits, and an end time.
- Hosts can review and moderate before sharing the final gallery.
That combination is what turns “please send photos later” into a repeatable system.
Frequently Asked Questions
What is a guest camera for events? A guest camera is a shared event camera experience where guests scan a QR code (or tap NFC) to take photos that upload automatically to one event gallery.
How do you collect event photos without apps? Use a camera-first QR or NFC flow that opens instantly in the browser or an iPhone App Clip. Avoid workflows that require downloads, accounts, or manual uploads.
Are guest camera galleries private? They can be. Look for tools where galleries are private by default, accessible only to invited guests, and where hosts can review photos before sharing.
Should I use a shared iCloud or Google album instead? Shared albums can work for groups that already use them, but participation is often lower because guests must accept invites, sign in, and upload later. A guest camera is designed for in-the-moment uploads.
How many QR codes should I place at my event? More than one. Aim for multiple join points in high-traffic pause areas (welcome sign, bar, tables). Redundancy increases participation.
Create a guest camera in minutes
If you want a simple way to collect event photos without apps, logins, or post-event chasing, create a Moment on Revel.cam. You will get a QR code, NFC option, and link guests can use to join instantly, take photos, and build one shared gallery you can review and reveal when the event ends.

A writer interested in connection, memory, and the everyday moments that matter more than we realize.
Tags: Event photo collection , Event photo sharing , Event photography , Corporate events , Event planning , Shared event photos